
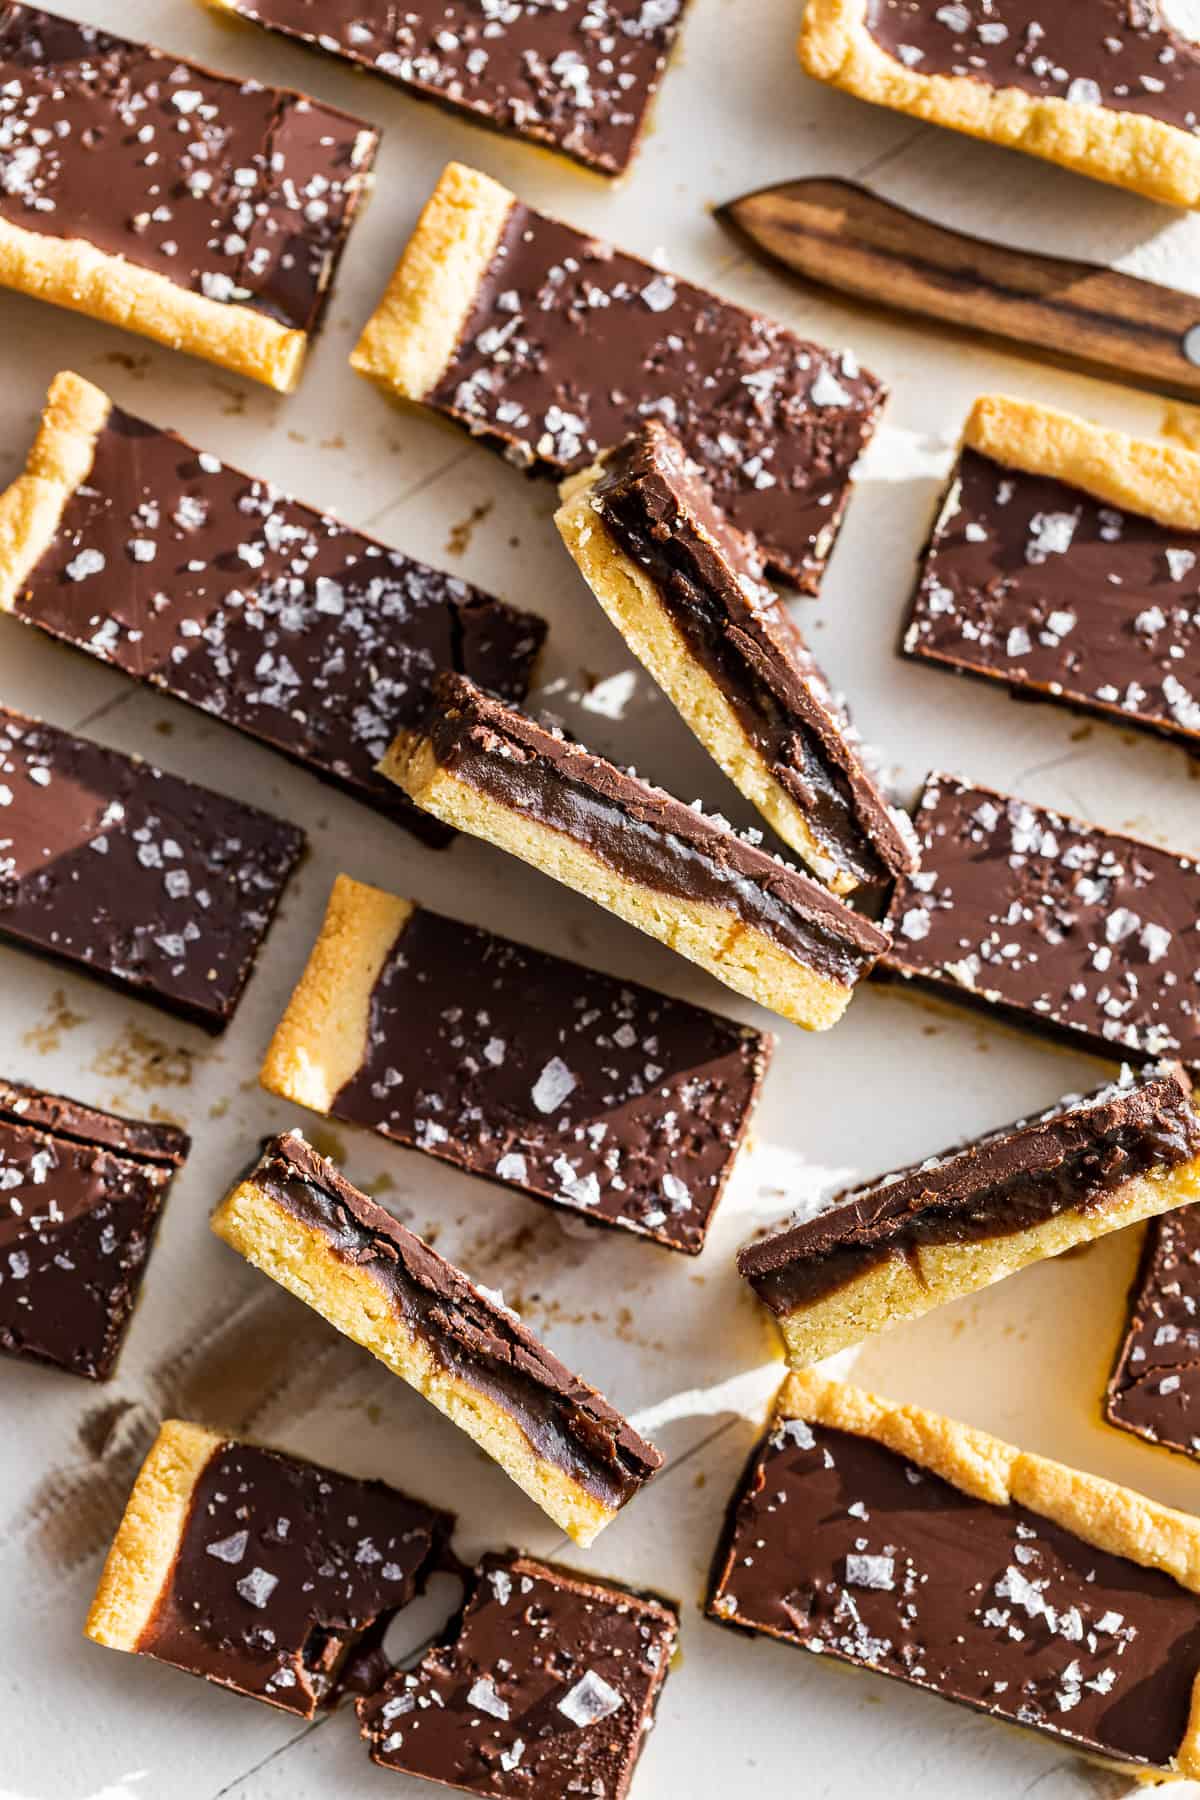
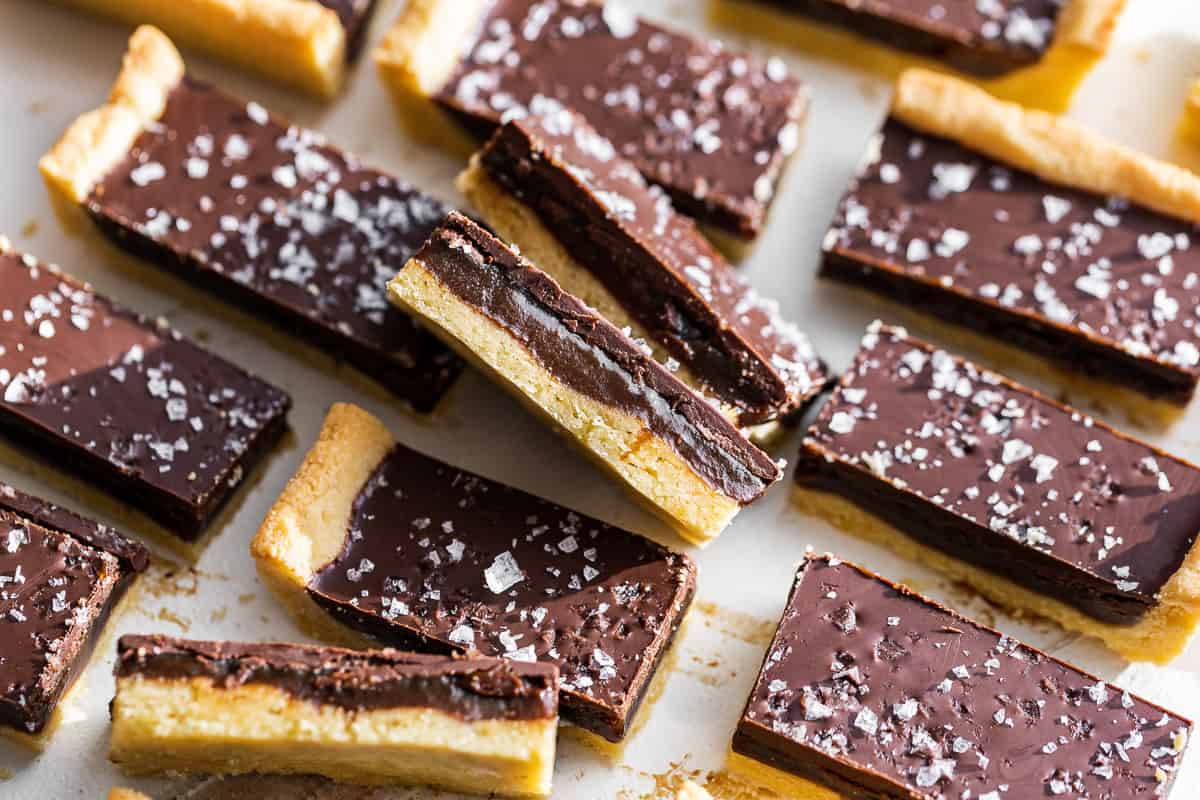
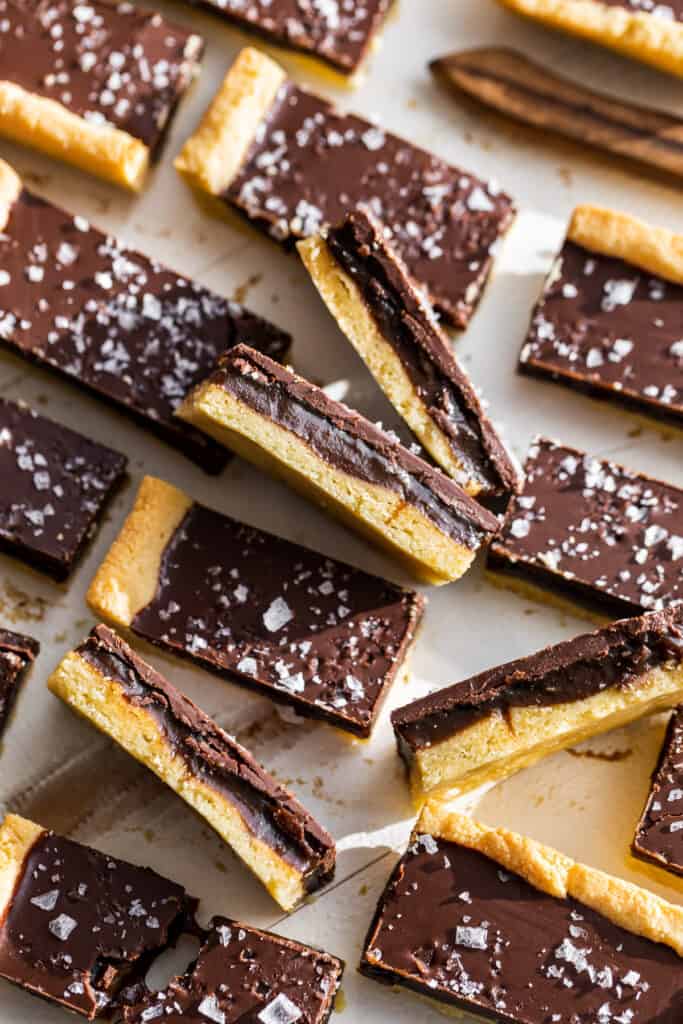
These Homemade Paleo Twix Bars are easy to make, and everyone goes crazy for them! A buttery shortbread crust is topped with a homemade caramel sauce and covered in a dark chocolate layer sprinkled with sea salt. They are absolutely decadent and a must-make holiday treat. This recipe is perfect for potlucks, and holidays like Christmas and Valentine’s Day.
Twix was one of my absolute favorite candy bars growing up. I mean I think its only real competition was Reese’s peanut butter cups. And really can you even compare caramel & chocolate to chocolate & peanut butter?
It doesn’t seem fair. After that comparison is much like apples to oranges in my mind. They’re both good, but completely different! Even though I loved all those goodies growing up, I can’t even remember the last time I actually had a Twix bar.
That’s probably because my mom used to make something really close to these Homemade Twix bars during the holidays. And we were all lucky enough to indulge in those little bars of greatness.
Her version was even better than the candy, and they were my favorite holiday treat. So this year I decided it was high time to make a gluten-free and paleo version.
Ingredients & Substitutions
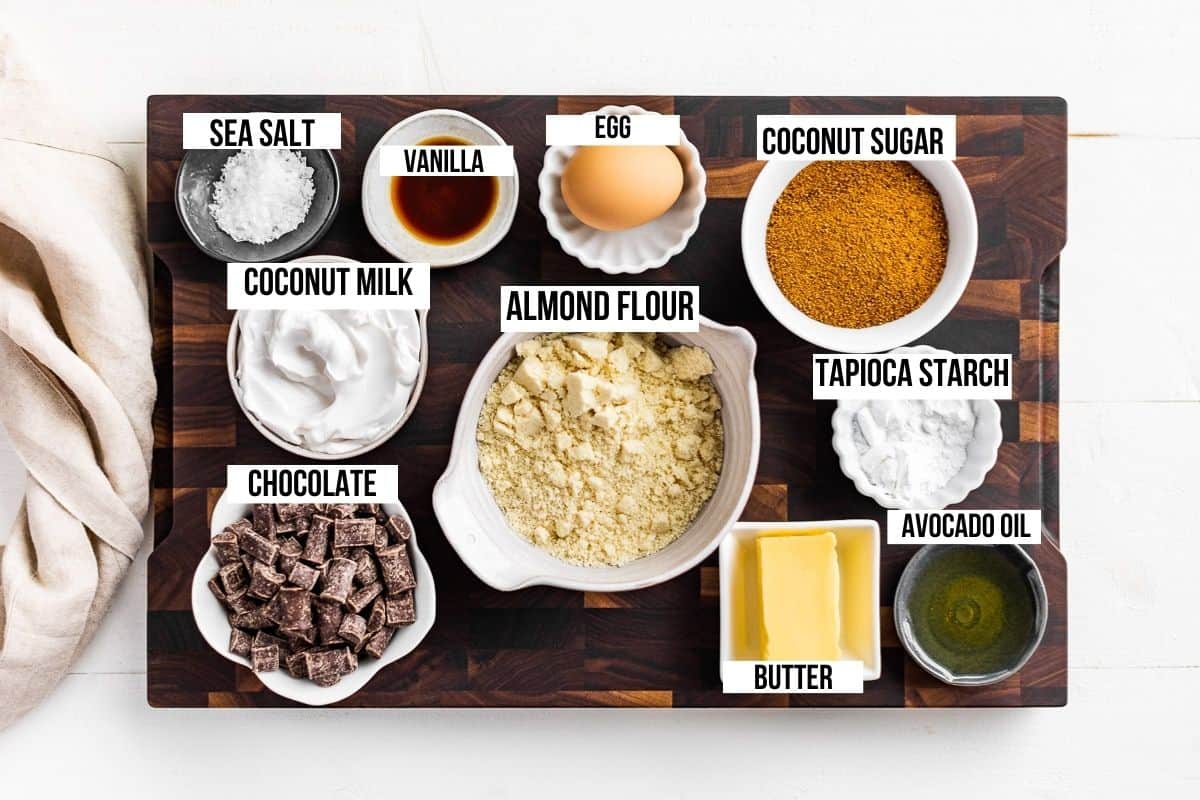
- Almond flour – makes the perfect buttery shortbread crust while keeping these both gluten-free and paleo.
- Tapioca starch – combines with the almond flour and helps it to hold together.
- Butter – or coconut oil, avocado oil, or vegan butter can also be used here to make a buttery shortbread crust. I personally would steer away from coconut oil if possible just because it has too much coconut flavor.
- Egg – or your favorite egg substitute works here since it’s a crumbly shortbread crust.
- Coconut sugar – is what makes up the bulk of the caramel layer. There’s no way to reduce the sugar here without giving up the caramel. So I recommend just cutting smaller bars, these are rich!
- Coconut cream – scooped from the top of a chilled can of coconut milk simmers together with the coconut sugar to make caramel.
- Vanilla extract – just a touch rounds out the rich flavor of the caramel filling.
- Chocolate – chips, chunks, or chocolate bar, just make sure it’s semi-sweet chocolate so it melts smoothly.
- Flaked sea salt – sprinkled over the top of these Twix bars gives them an adult flavor of salty-sweet.
How to make these Paleo Twix Bars recipe step by step
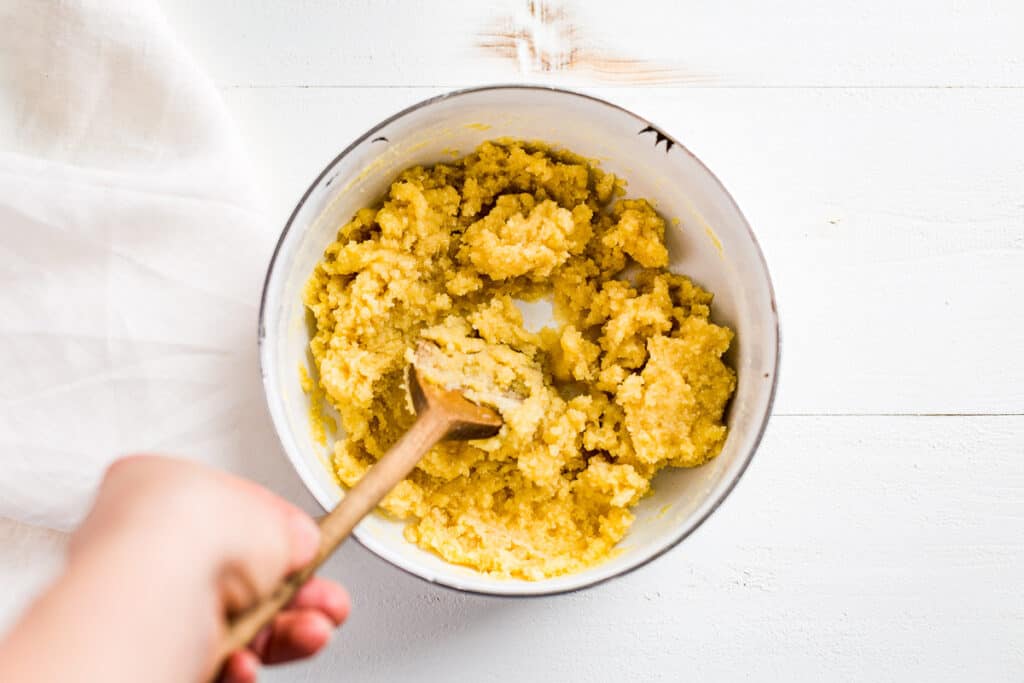
Step 1: Stir together the dry ingredients for the shortbread in a medium bowl before adding the melted butter and egg. The crust mixture will be stiff but easy to pat out by hand.
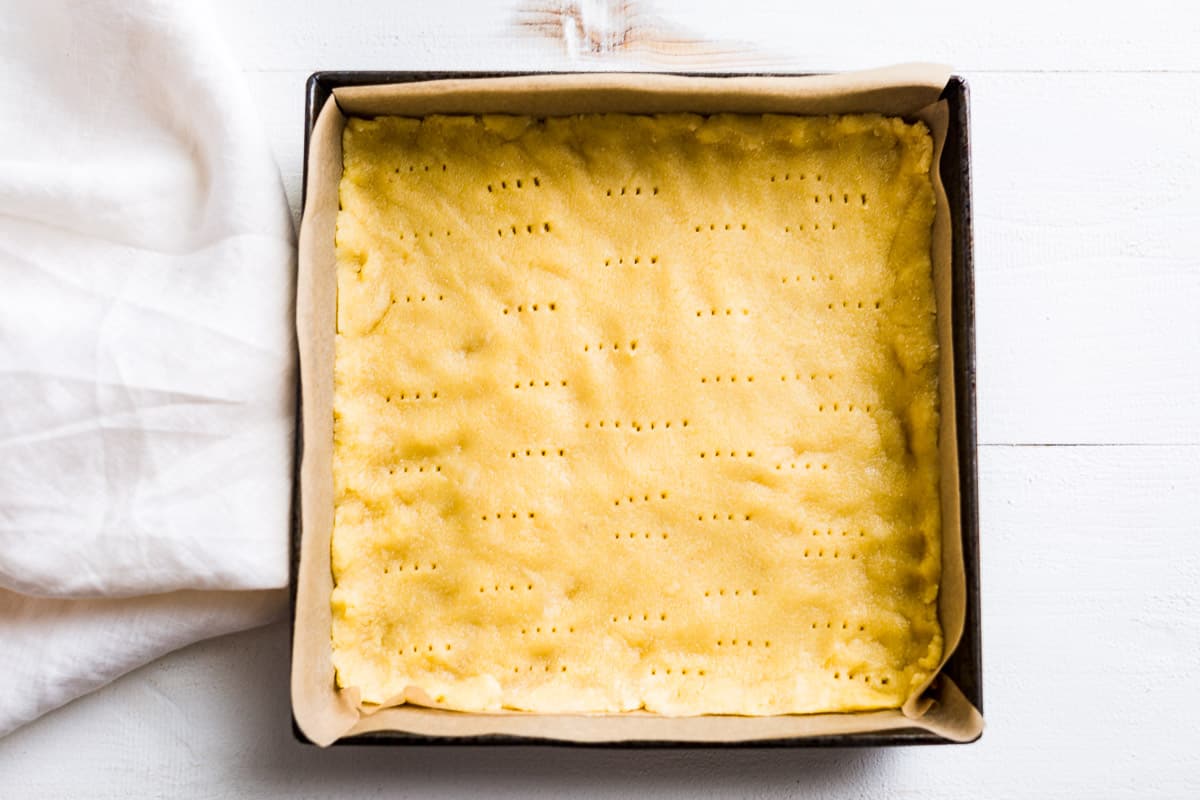
Step 2: Pat the crust into a parchment-lined baking pan making an edge around 1/4-1/2″. Use a fork to prick the bottom to prevent it from bubbling up. Then bake and cool before adding the caramel filling.
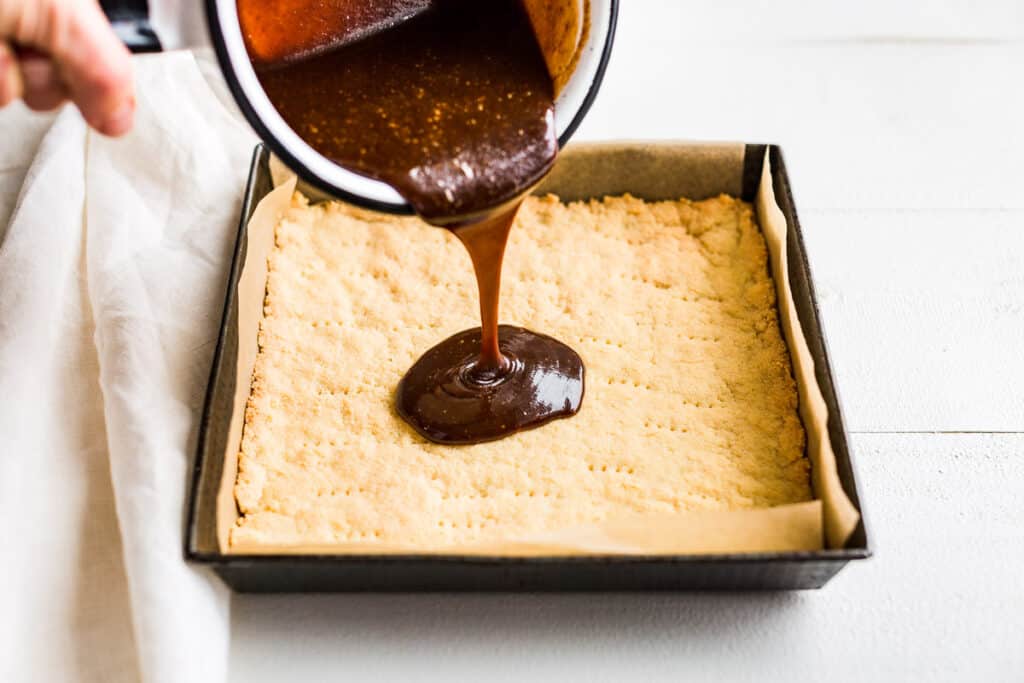
Step 3: For the caramel filling, simmer the ingredients together until the caramel has been reduced to 1 cup. Then pour the caramel over the top of the chilled shortbread cookie crust. Chill in the fridge until firm before adding the chocolate layer.
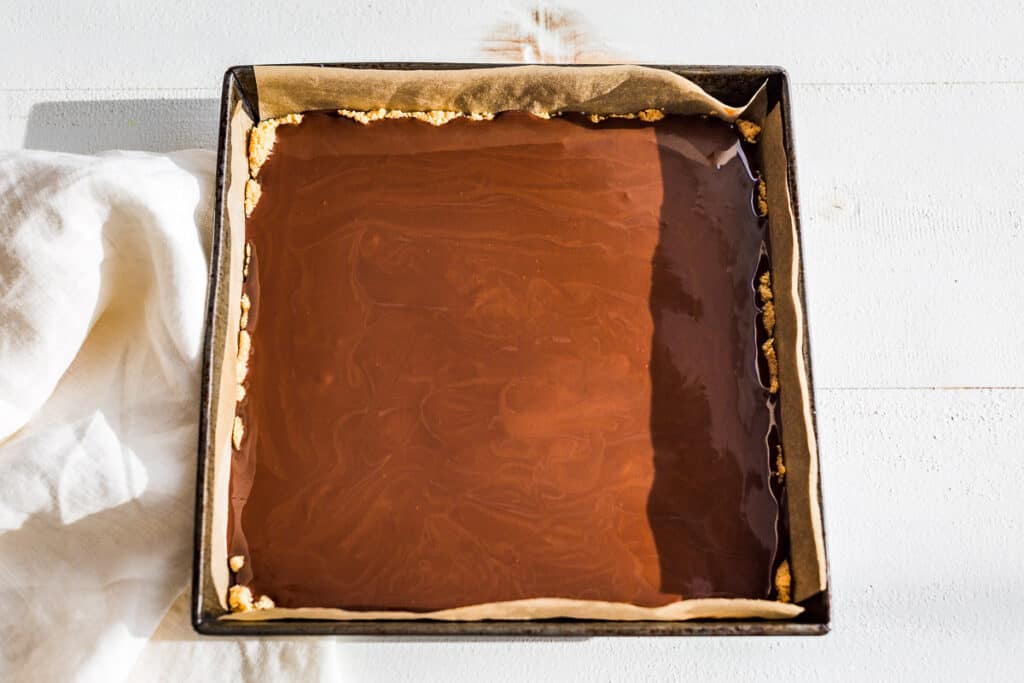
Step 4: Melt the chocolate and avocado oil together over low heat stirring constantly just until the chocolate has melted. Pour the melted chocolate over the top of the chilled caramel layer and tilt the pan to cover all of the caramel.
Step 5: Chill until the chocolate is beginning to set up, about 30 minutes, then sprinkle the sea salt over the top.
Ways to serve this
- Serve these Twix bars with after-dinner drinks like coffee to compliment the richness.
- Pass a tray of fresh fruit for dessert, then hand out the Twix Bars as the finale.
- Add a scoop or two of my Vanilla Ice Cream or Coconut Ice Cream.
FAQ’s
In an airtight container in the refrigerator for up to a week, or in the freezer to enjoy for up to 3 months.
Real whole food ingredients are what make these Twix bars healthy! The caramel filling is also made with a natural sweetener, (coconut sugar) which makes this a healthier, but still very indulgent treat. The shortbread crust is also naturally gluten-free thanks to the almond flour in place of the processed white flour.
Storing leftovers
- To store – place any leftovers into an airtight container and refrigerate for up to a week.
- To freeze – place in an airtight container and freeze for up to 3 months.

Tips & Tricks
- Be sure to reduce the caramel to 1 cup, otherwise, it won’t fully set up. There’s no nut butter in this recipe like many Paleo Twix Bars. Just pure caramel flavor, but it’s important to make sure the caramel is properly reduced. To make measuring easier, grease the inside of a 1-cup glass measuring cup. Pour the caramel in to check the amount. If it’s not done, pour it back into the pan and reduce some more. It won’t stick to the measuring cup if it is greased.
- Use a large wide pot to cook the caramel quickly. I have tried a smaller saucepan and it takes way longer to reduce the caramel and it doesn’t taste quite as good.
- Dietary notes – these Twix bars are gluten-free, and grain-free, with a dairy-free option below as well. For vegan Twix bars, follow the suggestions for dairy-free and use the egg substitute in the crust.
I really hope you enjoy these Paleo Twix Bars! If you do get a chance to make this recipe, I’d love to hear from you in the comments.
Paleo Twix Bars
INGREDIENTS
Shortbread Crust:
- 1 1/4 cup fine almond flour - + 1/4 cup additional, see notes
- 2 tbsp tapioca starch
- 1/4 tsp sea salt
- 1 egg - or egg subtitute
- 1/4 cup or 4 Tablespoons melted ghee - salted butter, avocado oil, vegan butter, or coconut oil for dairy free
Caramel Layer:
- 1 cup of coconut cream from 1 can full fat coconut milk - refrigerated, see notes
- 1 cup coconut sugar
- 1/4 tsp sea salt
- 1 tbsp vanilla extract
Chocolate Layer:
- 3/4 cup semi-sweet chocolate chips - I use the Enjoy Life (allergy friendly)
- 2 tbsp avocado oil - or coconut oil
- Flaked sea salt for sprinkling over the top
INSTRUCTIONS
- Preheat the oven to 350ºF. Then lightly grease an 8″ baking pan. Cut 2 strips of parchment paper the width of the baking pan, then place them into the pan crosswise.
- In a small mixing bowl, combine the almond flour, tapioca starch, sea salt, egg, and melted ghee/butter until a stiff dough forms. Add the additional 1/4 cup almond flour only if the dough looks a bit loose still.
- Pat the dough evenly into the prepared pan, making a rim around the edges between 1/4″- 1/2″. Prick the crust with a fork and bake until golden brown, about 15 minutes.
- Let the crust cool to warm or room temperature before pouring the caramel layer on.
- Once the crust has cooled, make the caramel layer. Start by scooping the hardened coconut cream from the surface of the can, this will measure 1 cup. Set aside the liquid to another use like a smoothie.
- Add the hardened coconut cream to a large wide pot, about 9″ diameter, along with the coconut sugar and sea salt. Bring the mixture to a boil, then reduce and simmer until thickened, for about 10 minutes. Remove the caramel from the heat and whisk in the vanilla extract.
- You will have 1 cup of caramel sauce after it’s reduced. If the caramel sauce hasn’t been reduced enough, the caramel layer will be soft, even after refrigeration. To easily measure, lightly grease a glass measuring cup, this way the caramel won’t stick to it.
- Pour the caramel layer over the cooled crust, then refrigerate until it’s firm, about 1 hour.
- For the chocolate layer, melt the chocolate chips and avocado/coconut oil together in a double boiler, stirring constantly until melted. Pour the chocolate layer evenly over the hardened caramel layer, then refrigerate again until it’s firming up, about 30 minutes.
- When you can see the chocolate layer is no longer glossy, it’s time to sprinkle on the flaked sea salt. If you add the sea salt too soon, it will sink into the chocolate. This is only an aesthetic thing and if it happens they still taste the same.
- Refrigerate again until completely set up, an additional 1-2 hours. Cut into bars and serve chilled for the cleanest looking slices.
NOTES
nutrition facts
This post was originally published in 2019 but has been updated in 2021 with more tips, information, and new photos.
Hi Kari
These look soo good. Lately I’ve been trying to minimize my sugar intake, so thanks for making a healthier recipe of my favorite candy of all time!
Definitely one of my favoite recipes I’ve ever made because it’s my favorite candy too, so glad you have a healthier go-to now!
These are absolutely delicious. Got my husband hooked on them too. Even if my caramel layer doesn’t firm up, we still enjoy them!!
The caramel layer should be firm enough to slice, if not, try simmering it a little longer next time. So glad you both enjoyed them!
this picture looks sooo good i love it
Thanks so much!
Ok Kari,
I’m actually commenting, because you have done it.
Not only are you the only person to make a long flake pie crust as good as my Mom, not only have you made the best raspberry dessert I have eaten, you have answered the question we and likely countless others casually poked at over a decade ago! Can Twix be remade healthier, and if so would we want to eat it? Yes, it obviously can, and we do.
The fact that these are far beyond what either of us would have considered back then proves your dedication to health and healthier treats!
This is truly an inspiration. I’m not even joking. Twix bars were a serious favorite, but even if they came gf I would probably not enjoy them now. This, however, may just bring my baking out of hibernation.
Thank you!
Twix bars are a serious favorite of mine too, and I sure hope you enjoy them sometime! Also I’m racking my brain to try and figure out what raspberry dessert you were referring too, I guess it’s been to long for me to remember? And also thanks so much, you’re too kind! 🙂
Hey Kari!
You’re completely welcome for the praise, it’s earned. And please note, I haven’t even mentioned the delicious savory things, like posole, curry, and more!
The dessert was a summertime raspberry mousse on layer of dark chocolate, with a very lightly sweet, rich chocolate cookie crust underneath. So fresh and scrumptious.
Possibly this was around the same time as the rhubarb mousse in champagne flutes, also memorable.
Happy Tasty New Year!
Funny I don’t remember that raspberry dessert at all, but I’m making notes because that sounds like something I need to recreate! I do remember that rhubarb mousse though, haven’t been able to find the recipe, but I’ve never forgotten how good it was. Also Happy New Year to you as well!
These look sooooo good, I’m definitely going to make them . . . I secretly LOVE TWIX candy, but this seems like a better option 😉
I hope you enjoy them, I’m crazy about Twix too!
These are the best! Love that I can enjoy delicious paleo Twix bars!
Thanks, hope you enjoy them!