
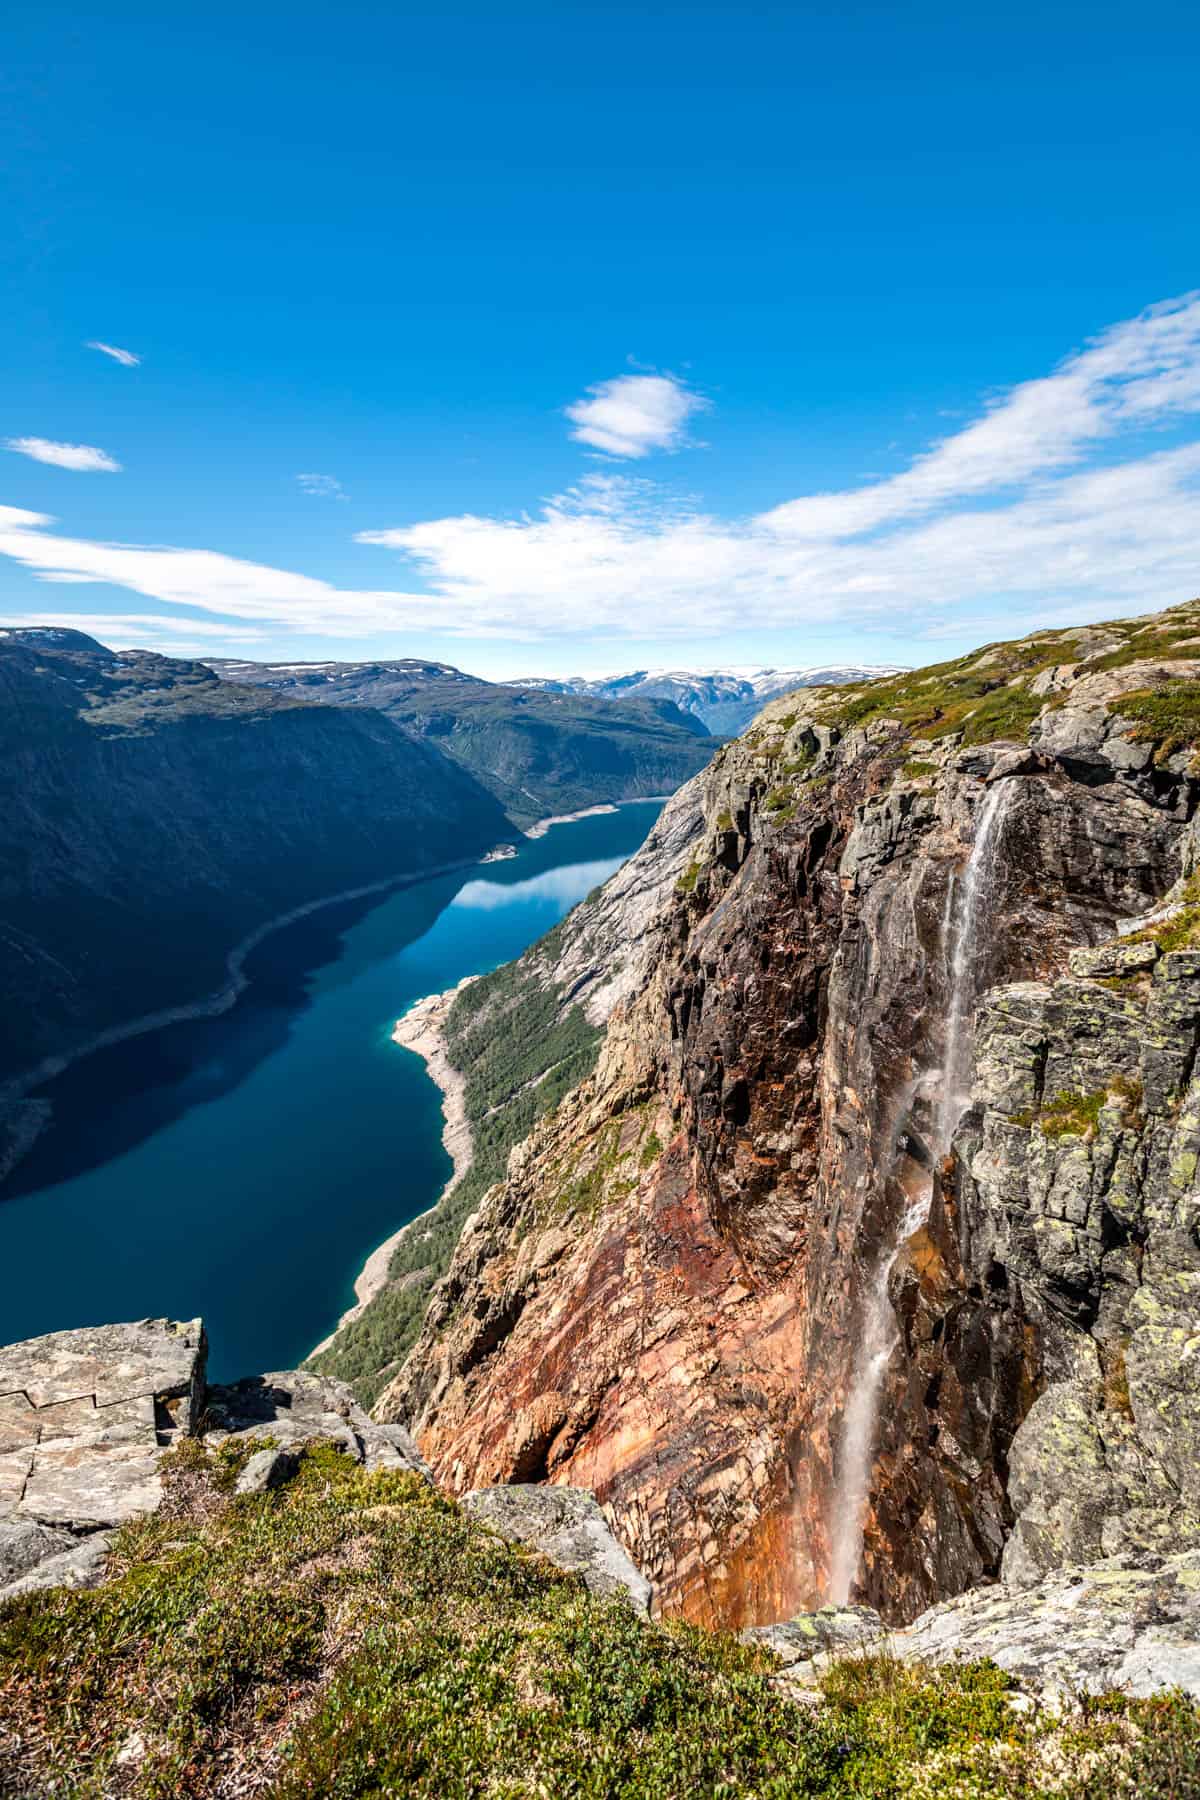
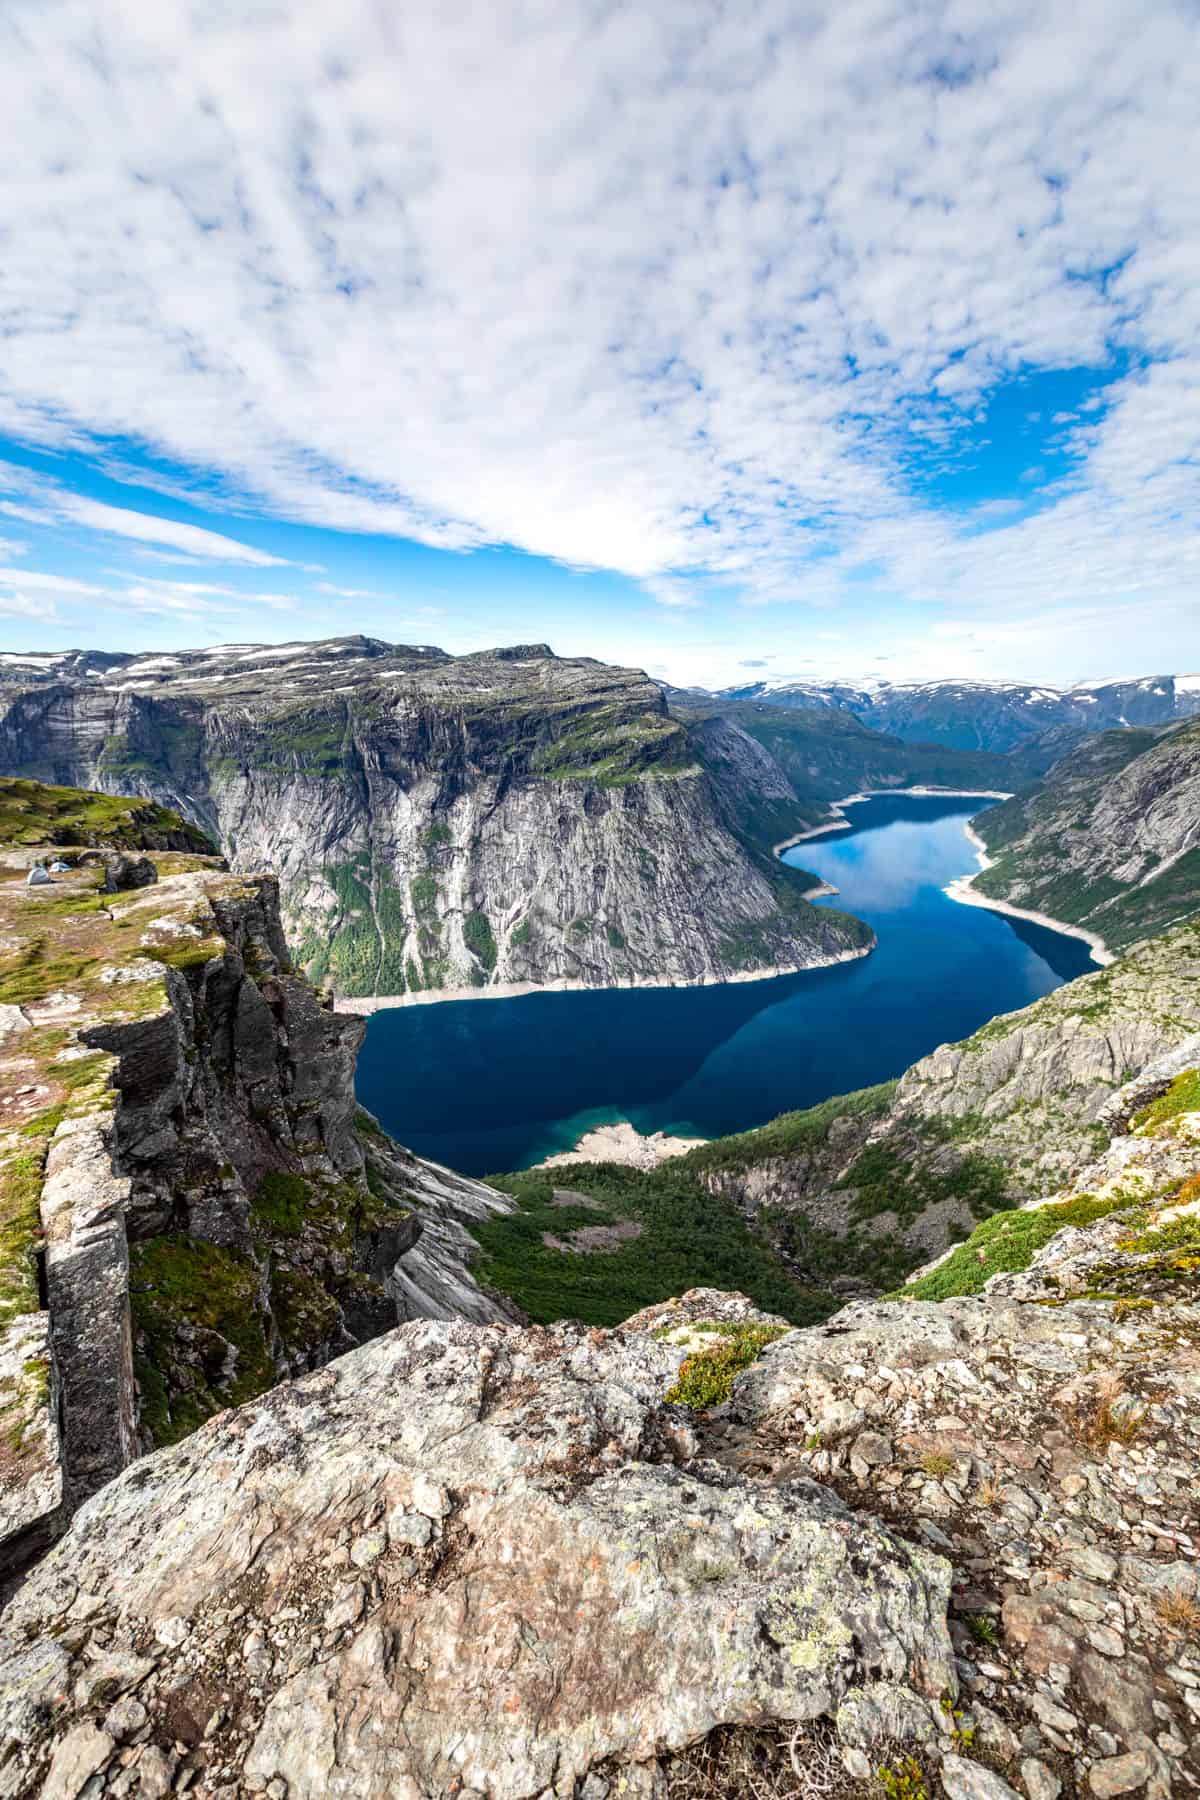
The #1 most popular hike in all of Norway, the view from Trolltunga is not to be missed! This iconic rock rises 700m above Lake Ringedalsvatnet. There are numerous ways to get there depending on the size of the vehicle, and we’ll go through the public transport bus system below. Plus I’ll give you all our best tips for how to have a great day hiking this very popular trail. A little preparation goes a long way towards having a great day, and enjoying this tourist destination!
Once upon a time, they were running power up the valley below this stunning spot. And somewhere along the way, the Trolltunga rock overhang, or ‘cliff’ was discovered. Now many years later thousands of people come just to see this gorgeous spot.
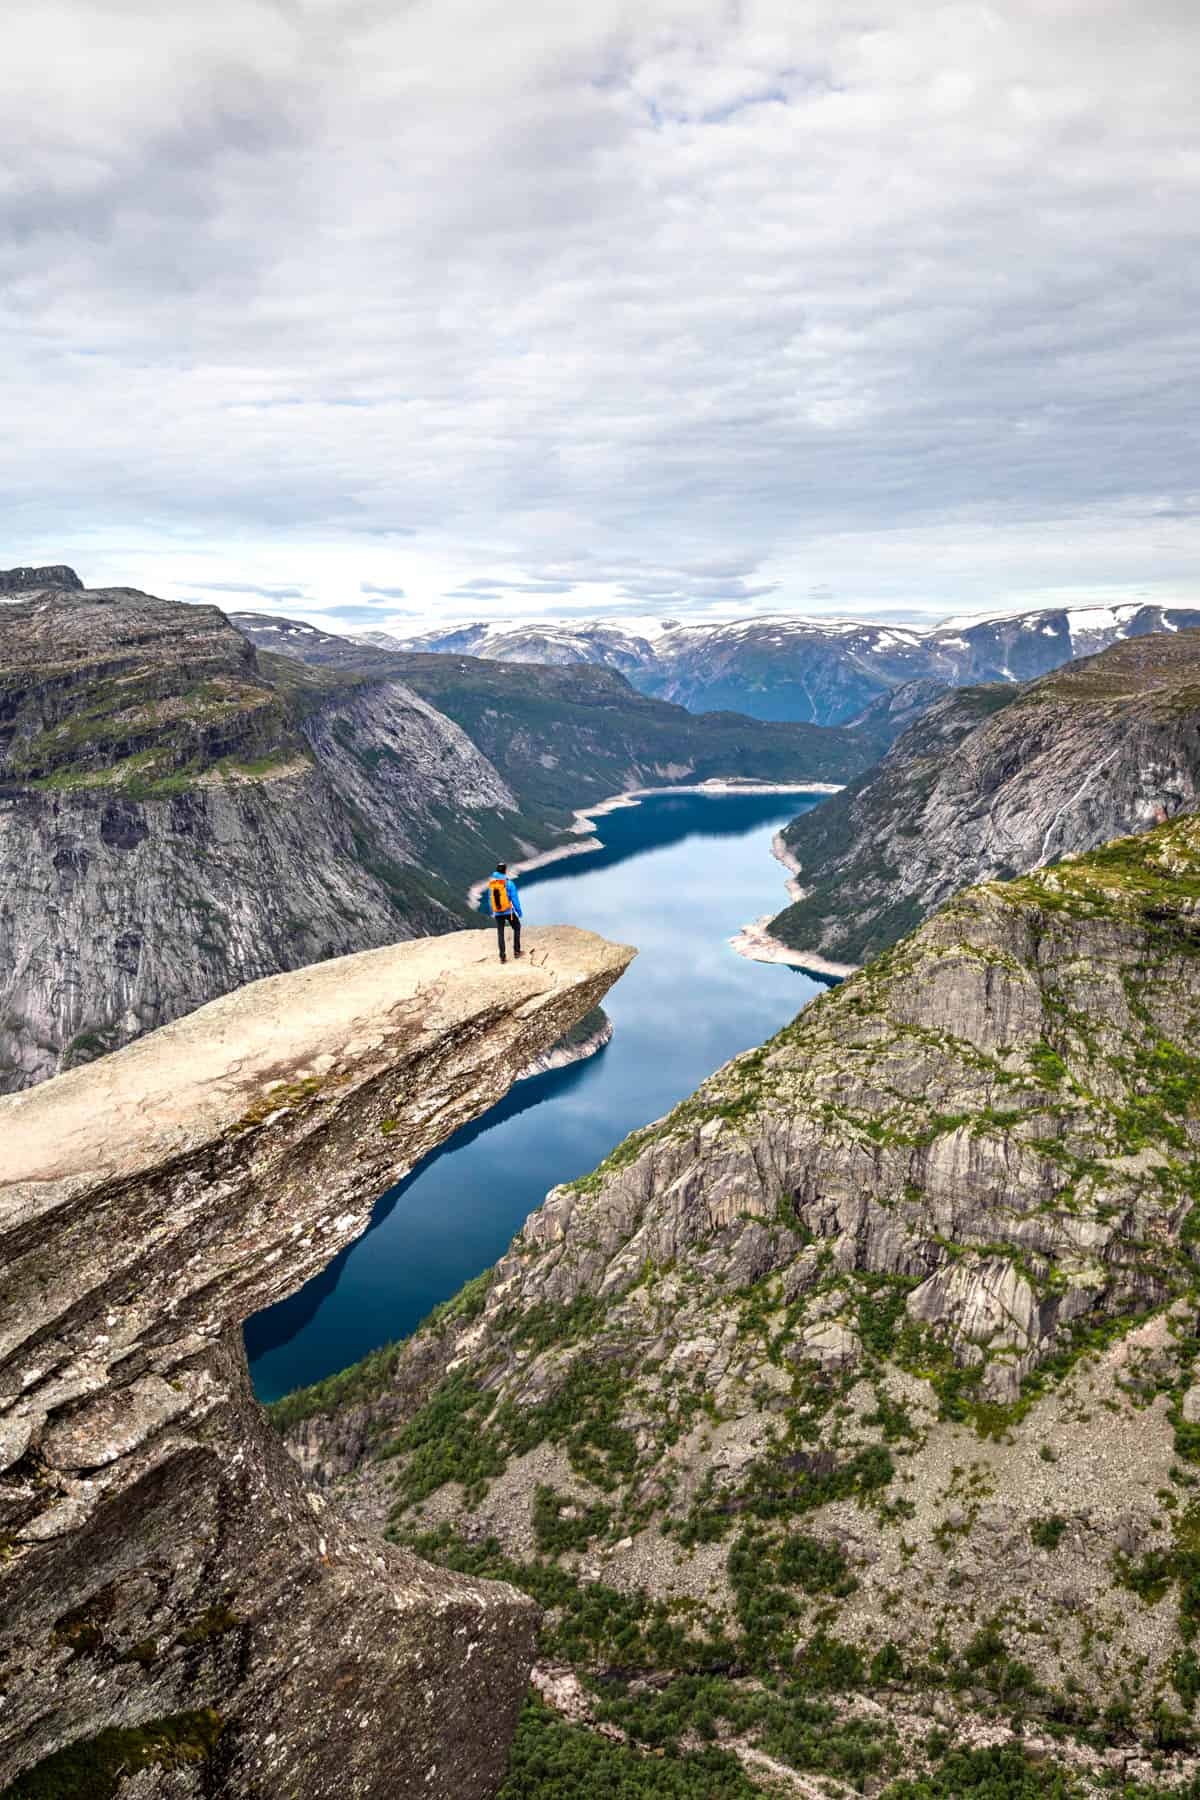
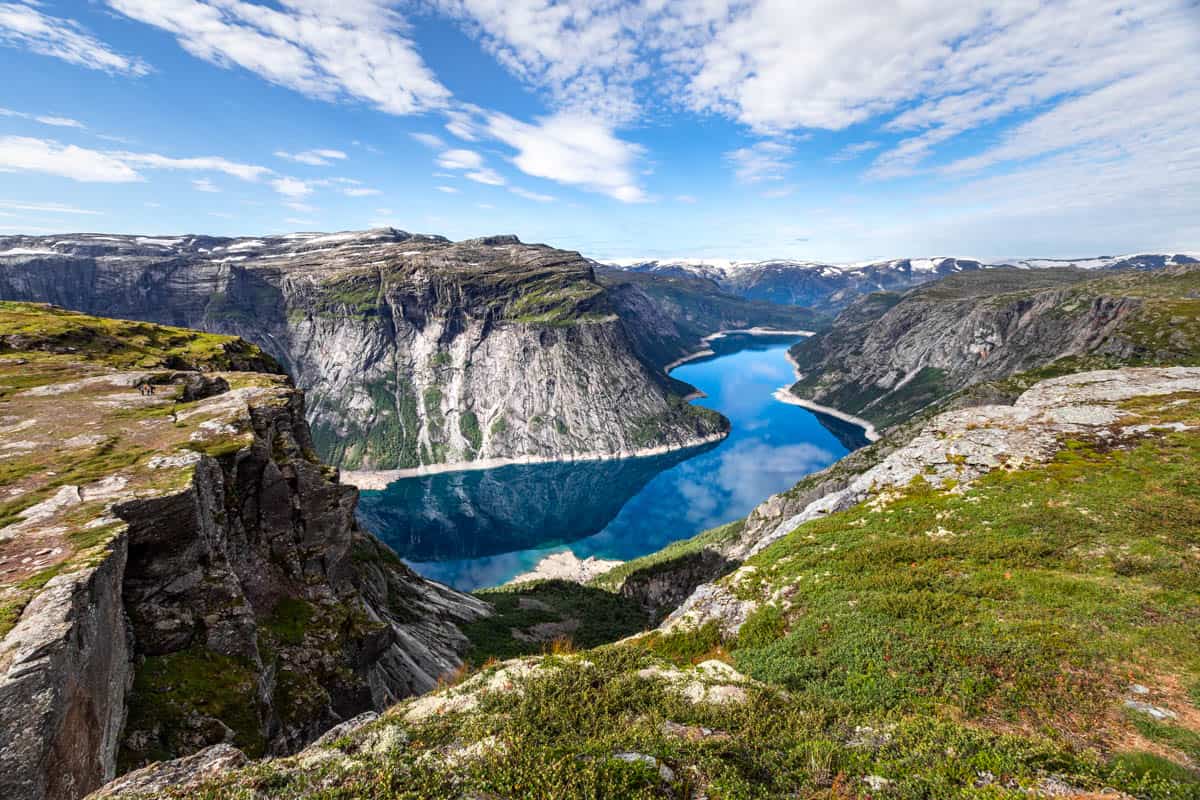
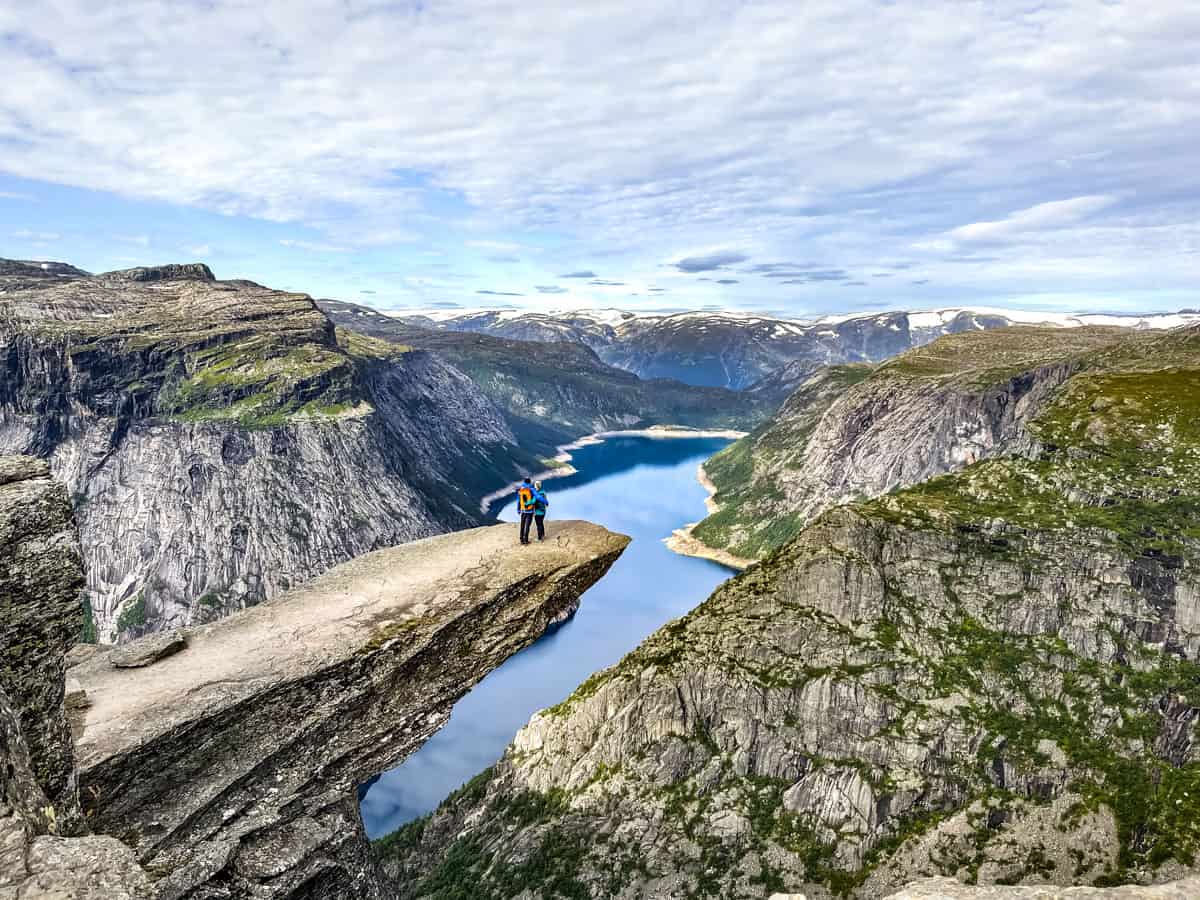
This iconic rock juts out over Lake Ringedalsvatnet, and is absolutely spectacular. There’s really no way to exaggerate how stunning it is. However, there’s no doubt this attraction gets incredibly crowded at times. We’ve heard of wait times of over 90 minutes just to get your photo on the rock!
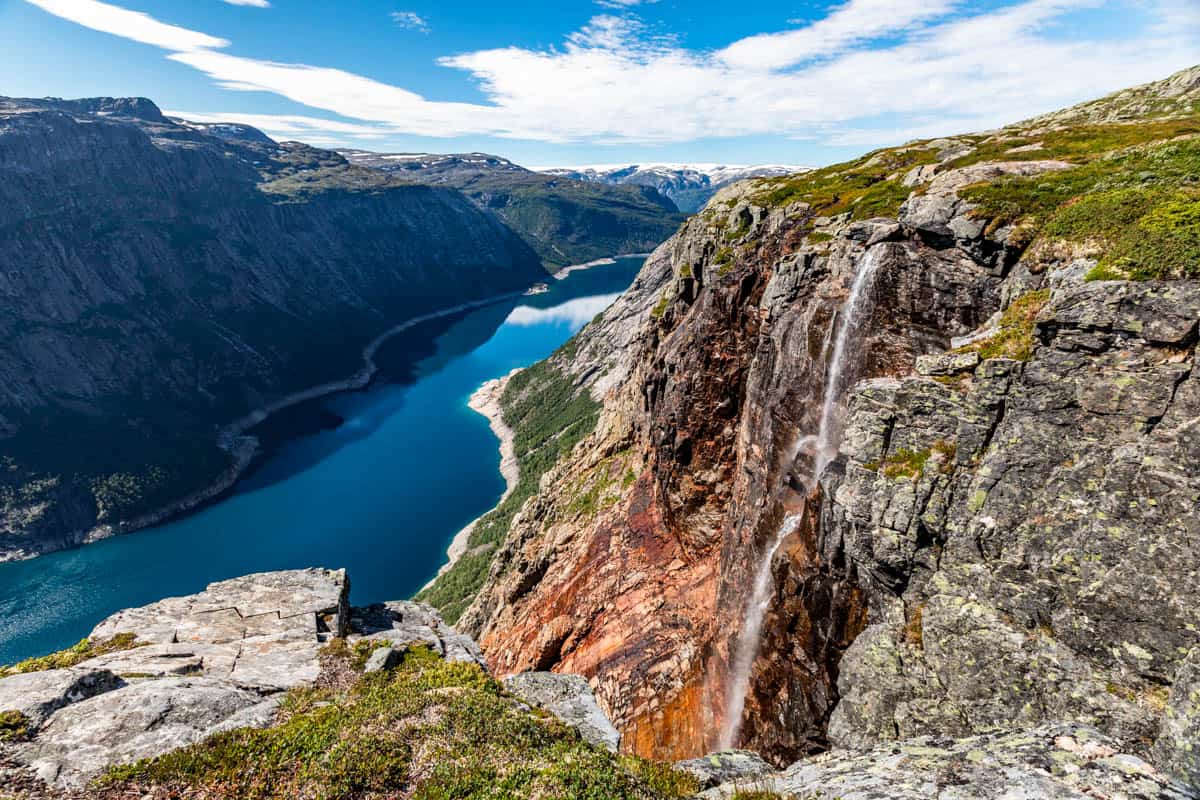
So stay tuned for all our tips on how to have the best time here. Also, there’s so much to see besides just the ‘Troll’s Tongue’ it pays to book in a bit more time to enjoy the varying scenery on the way back.
Everything you need to know about hiking Trolltunga
- Distance – 14.2 miles round-trip hike from P3 parking lot. Distance and elevation will vary depending on where you start (these are out stats according to AllTrails). The Trolltunga website lists the distance as 20 kilometers or 12.42 miles and 800 meters or 2,624′.
- Elevation gain – 3,159′
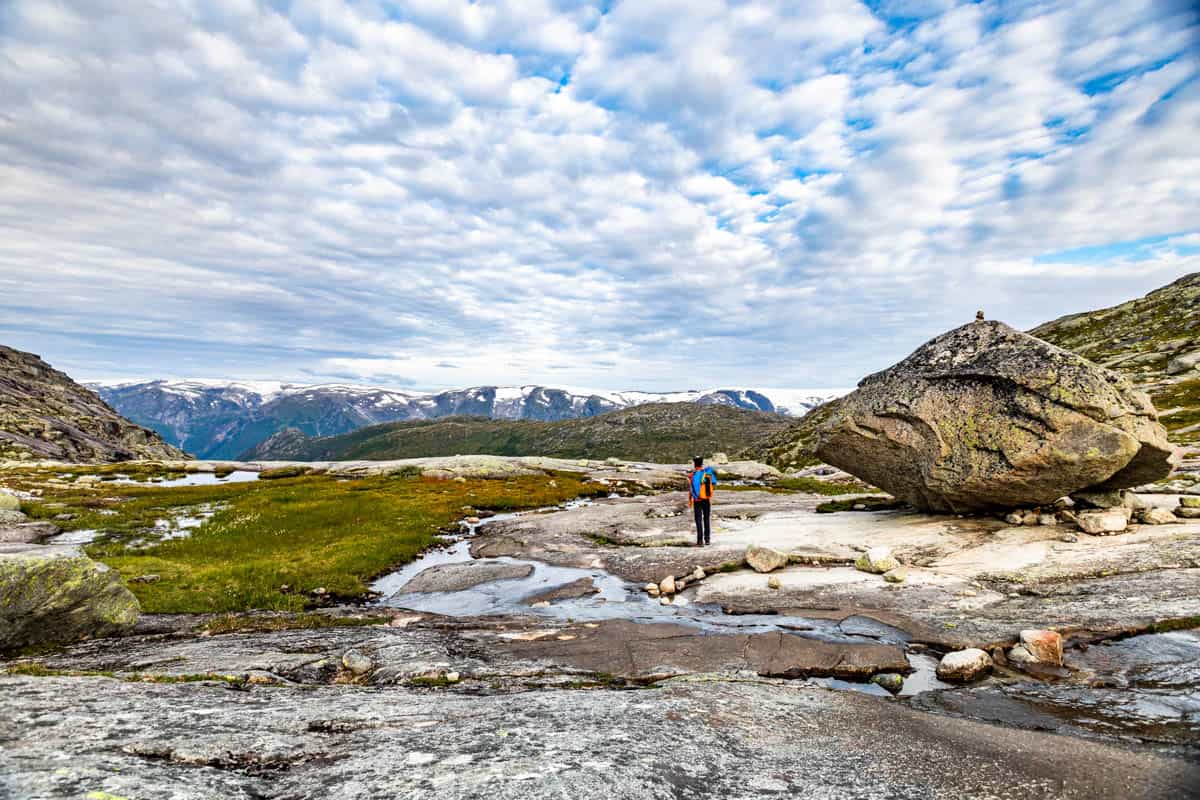
- Trail – slabs of rock with lots of dirt trail, and a small amount of rocks and rubble. Footing is generally very good, weather dependent.
- Difficulty rating – this trail is considered difficult and for experienced hikers. You definitely want to be in very good physical condition to do this hike. There are now wood steaks/sticks installed to keep you from getting off track.
- Time to complete – estimated hiking time is 8-14 hours depending on where you start. Our total time was 8 hours with lots of time for photos etc. from the P3 parking lot, (the shortest distance).
- Bathrooms – there are bathrooms at both P1 and P2, but there isn’t anything after you get started hiking.
- Parking – refer to the bus system below to figure out what the best parking situation is for you. The ultimate would be to score a spot at P3 if you book ahead, and have a small vehicle. We parked at P1 (there’s a parking fee) because we had a large van and bused from P1 to P2, then from P2 to P3. We recommend starting this hike from P3 which will save you 1,313 feet of elevation gain and 4.3 miles!
- When to hike – weather conditions depending, this hike is best done mid-June through mid-September. This hike can be reached October 3 – May 31, (winter months) but they recommend only going with a guide on a guided hike for safety in the winter conditions! Be sure to check the weather forecast before heading out. We were there in late August and the weather was incredible. But heavy rain and strong winds are not uncommon in this area.
FAQ’s
It depends on your level of fitness. Trolltunga is considered a very hard hike averaging 10-14 hours to complete. There weren’t any technical challenges or climbing involved that would require skill, and the trail is well-marked. If you’re in really great shape, but new to hiking you should be fine from P3. But I would not recommend this hike if you’re not in great shape – it’s just too long and hard!
Anywhere from 8-14 hours depending on where you park and your fitness level. I recommend getting to P3 by reservation or by bus to shorten the hiking distance. Our ‘moving’ time was 5:19:31 and we were in very good shape and moving fast! Our total time for this hike was 8:07:52 including our bus ride back to P2.
I think it totally depends on your fitness level. The scenery is jaw-dropping stunning and more than worth the bus schedule and time to get there. I would even go so far as to say it’s a ‘bucket list’ kind of hike. However, it’s a very hard hike, and might not be worth it unless you’re in great shape. No one wants sore muscles for a week when you’re on vacation. So if 13-17 steep miles sounds really hard, I’d say skip it and do something else.
You can drive or take a bus to P2 parking, from there you can begin the hike, or take a 2nd bus to P3 parking to shorten the trip. We recommend shortening this hard hike as much as possible to save energy for other things to see in Norway.
Tips for hiking Trolltunga in Norway
- Plan ahead as much as you can! You can reserve parking spaces at P3 ahead of time if your vehicle fits the requirements. We reserved our bus seats the night before, because we were too worried about booking any further ahead. And it made a big difference the next day having our reservations already paid for and ready to go.
- Start early and bring your patience! We took the first bus of the day from P1 to P2, then the first set of buses from P2 to P3. It definitely took some time, but we thought it was worth it to cut off the extra distance. We also arrived at the P3 trail start long before anyone who decided to walk rather than take the bus. Also, this way we had more energy to hike in other areas! From there we set a good pace to get to Trolltunga before the crowds arrived. We’ve also heard from others that late afternoon can be good as well if you can park your vehicle closer. We were completely reliant on the buses, so we had to start early.
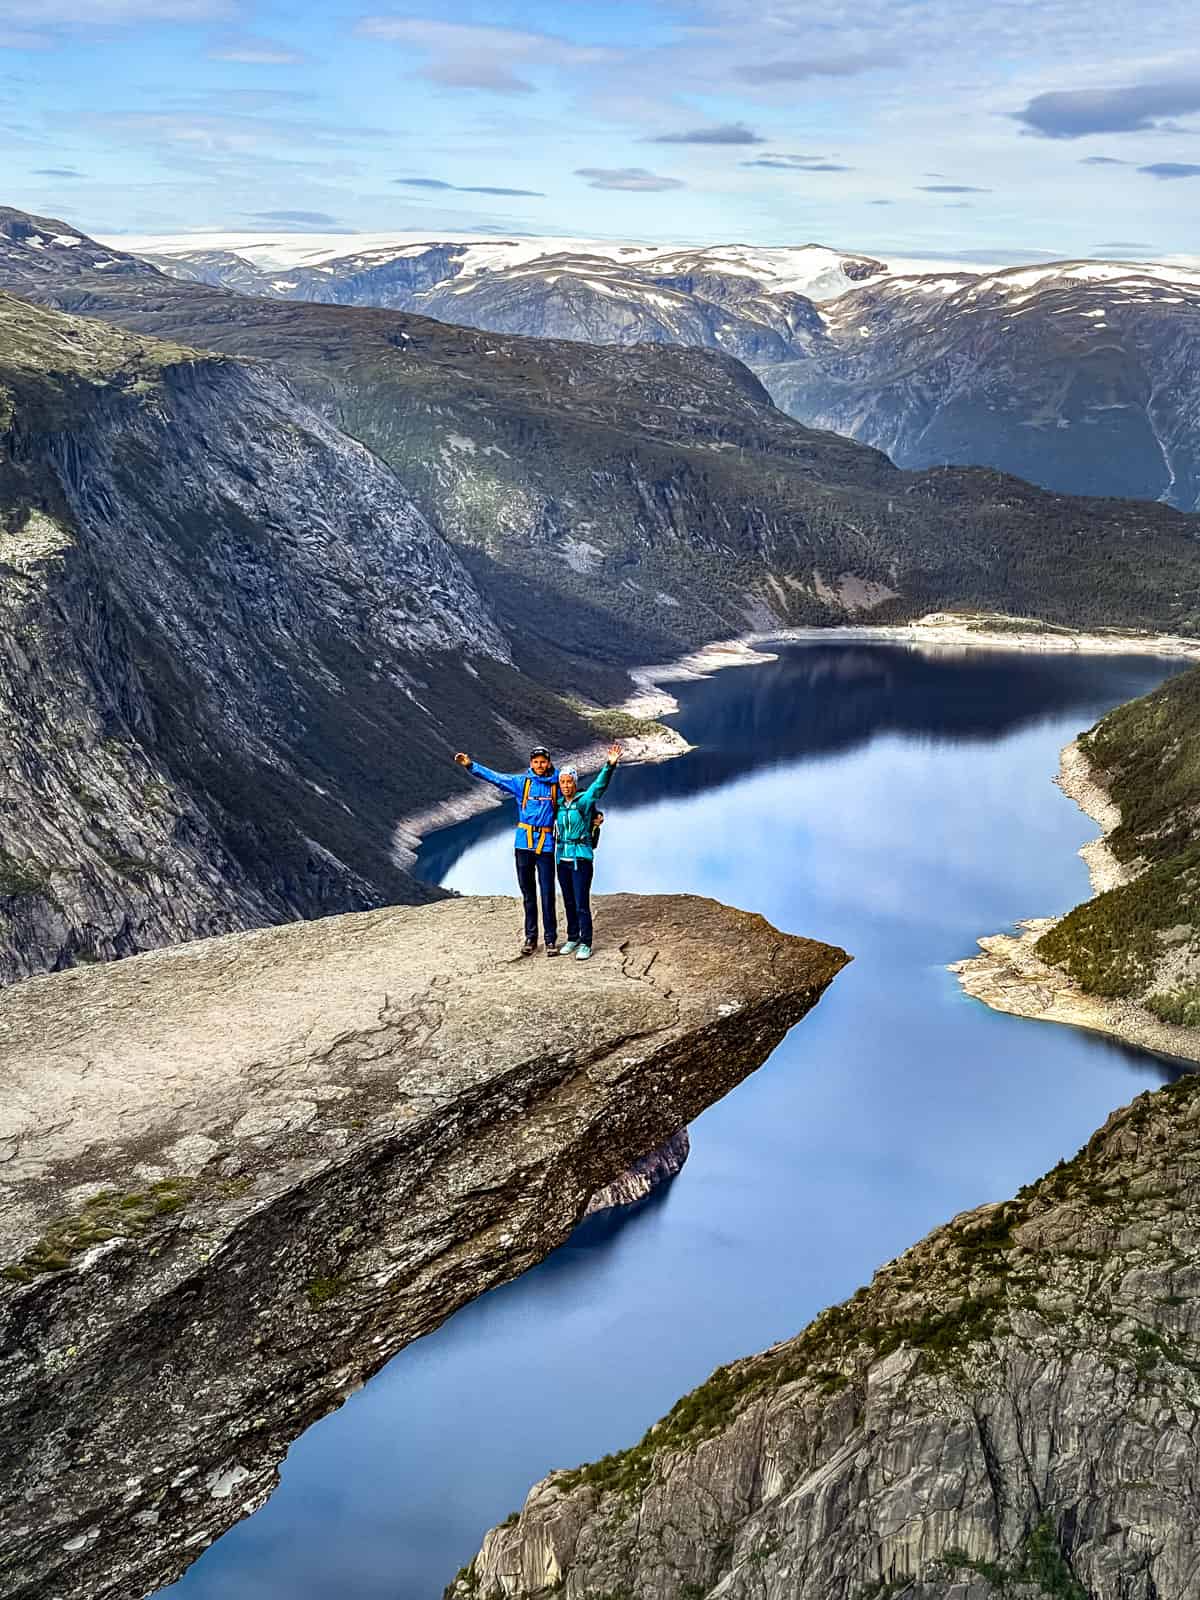
- Plan plenty of time to get photos. It’s considered normal to wait in line for 90 minutes to get your photo on the rock! We only waited 10-15 early in the day. Everyone was in a good mood, and going out on the rock more than once since there weren’t that many of us. We took photos for several couples, and another man took photos for us. No need to speak the same language, everything is easily worked out with hand gestures! And you’ll find everyone sort of gets into a jovial mood to help each other out taking photos!
- Consider backpacking here if you want a truly amazing sunset or sunrise shot without so much traffic! We left all our backpacking gear at home because we could only bring so much on our trip. And of course we were already loaded down with camera equipment. But Trolltunga would make a great backpacking destination.
- Have a GPS route downloaded. This trail is very easy to follow with good weather. However thick fog can roll in quickly in Norway and that could make this a challenge you didn’t expect. We had a GPS route for each hike we did in Norway, which was nice in a couple of cases. We never needed the route at Trolltunga because it’s well marked with lots of people and we had good weather. But it’s always better to be prepared.
Guide to the Trolltunga Bus & Shuttle System
- There are 3 parking lots total called P1, P2, and P3. It can get a little confusing because they also have Norwegian names as well. P1 is called Tyssedal, P2 is called Skjeggedal, and P3 is called Mågelitopp.
- The official website for Trolltunga is incredibly well laid out and so helpful! They break down in columns each parking lot + how far it is to hike + the current bus schedule. You’ll want to refer to that so you know exactly what hours are available depending on when you go. To book your bus ahead, head to this link for the shuttle buses and follow their directions.
- Check the Trolltunga website to see if your vehicle qualifies to go past P1. The reason there’s limits is because of the rock overhang on the road. This means taller vehicles can’t go up the road any further than P1. It’s also because the road is very narrow and larger vehicles can’t fit with the large buses. We had a large Volkswagon Crafter van, (which is tall) and so we needed to park at P1. On the bus heading up there was a large van trying to come down, and they ended up in the ditch in an accident – you don’t want to be that person!
- If there’s no parking available at P2, head back down to P1 and take the bus up!
- To park at P1 you pay at the parking machine, then take a bus. To go to P2 you pay at the toll, then you pay again when you park at P2. P3 only has 30 spaces at this time, and must they be reserved ahead + there’s another toll to pay. However you can just walk up the hill from P2 to the kiosk, and pay to ride the bus to P3. Other people choose to walk up the road from P2 to P3 but it adds 4.3 miles and an additional 1,313′ elevation gain.
- The easiest option is to drive to P2 and hike from there, however that makes for a very long and strenuous day. I recommend parking at P2 if your vehicle fits the requirements, then take the shuttle bus to P3.
Road season and closures
- Trolltunga.com lists out exactly when the road is opened or if there’s any closures. You don’t even have to dig into the website, its listed out right on the homepage at the top.
- There will be some closures moving into 2023 for road work through the winter months. They also close the road with very little notice any time the weather creates dangerous conditions. You can also check their Facebook page before starting out, but I have found their website to be the most up to date.
Extra hiking options and more tips for Trolltunga
- You can also backpack and use the designated sites on this hike.
- There’s also a via ferrata option you can book a guide for.
- When we went, drones were allowed but not in hiking areas. You also need to be licesned for Norway and Europe. We got our photos out on the troll’s tongue, then headed up the trail way away from the crowds. From there Tyler took the drone up for a short flight with views of Lake Ringedalsvatnet. It’s not allowed to fly over people on these more crowded trails in Norway, and it’s just good common sense!
- Pack it in, pack it out! This means literally everything from Kleenex etc. to your banana peels. This hike sees thousands of people, so it’s extra important to keep this gorgeous scenery as pristine as it should be.
Our day hiking Trolltunga
This was our first hike after landing in Norway. We started this day absolutely exhausted, but happy to finally be hiking in Norway! It took us 4 days to get to Norway with some really ‘next level’ airport experiences. So with 4 hours of sleep, we woke up at the crack of dawn, and lined up for the first bus of the day.
We started at the P1 parking lot because our van was too big to go any further. Then we paid for our parking spot, then got on the bus to head up. We had purchased our tickets from P1 to P2 the night before to make it a little easier.
From there we bolted off the bus and ran up the hill to line up for the bus to P3. You could just take it at a pace, but we really wanted to beat the crowds. And once the day was over, I still think some earlier rushing was worth it!
Once we arrived at P3, we set a brisk pace to get to Trolltunga. This turned out to be a good idea because we had plenty of time to get photos this way. However, it’s always best to go at the pace that feels best for you so you’re not too tired!
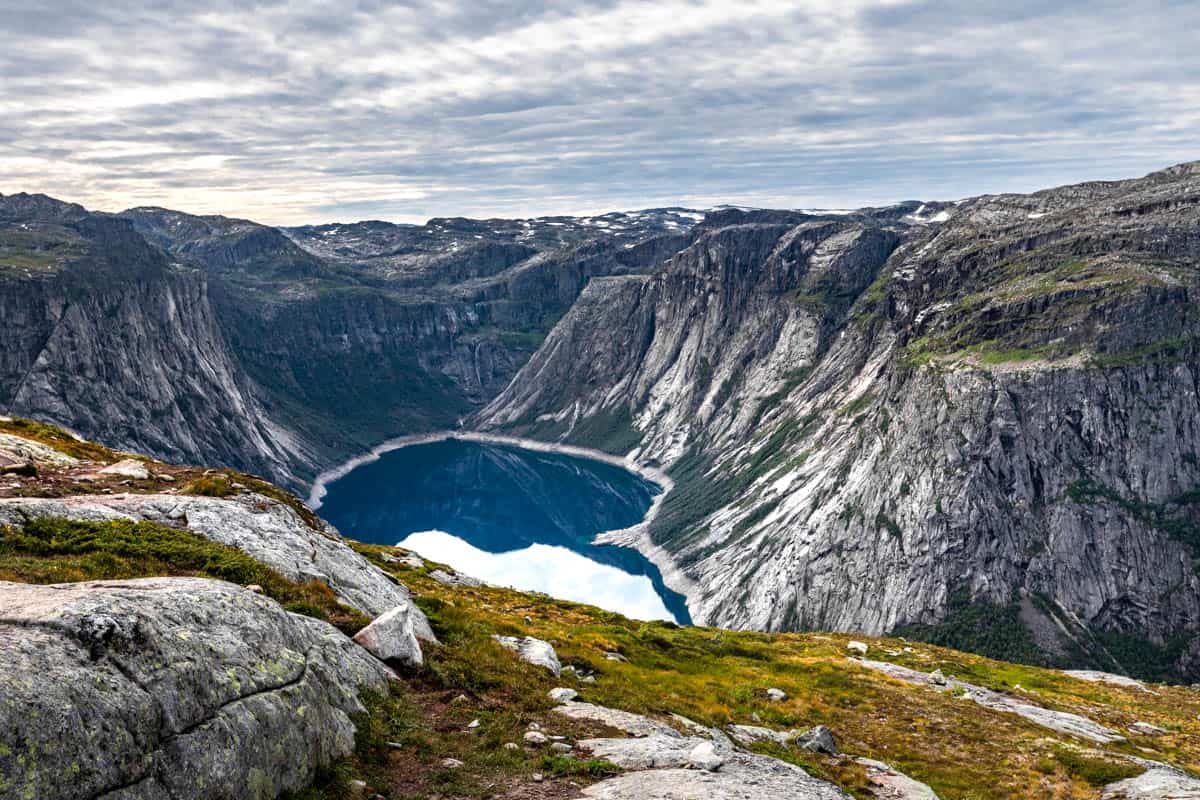
The trail is fairly steep for a while, but once you get up high enough to see the water, it gives you a bit of a break! The steepness moderates a bit with a little more rolling terrain heading upwards to the Troll’s Tongue.
When we got there, the lineup for photos was 10-15 minutes or so. Everyone was in a great mood, and taking turns taking photos for each other.
It was a nice way to experience this famous hike for sure! Later in the day the line was enormous, and the laughing and joking wasn’t there anymore, everyone was more resigned to the wait.
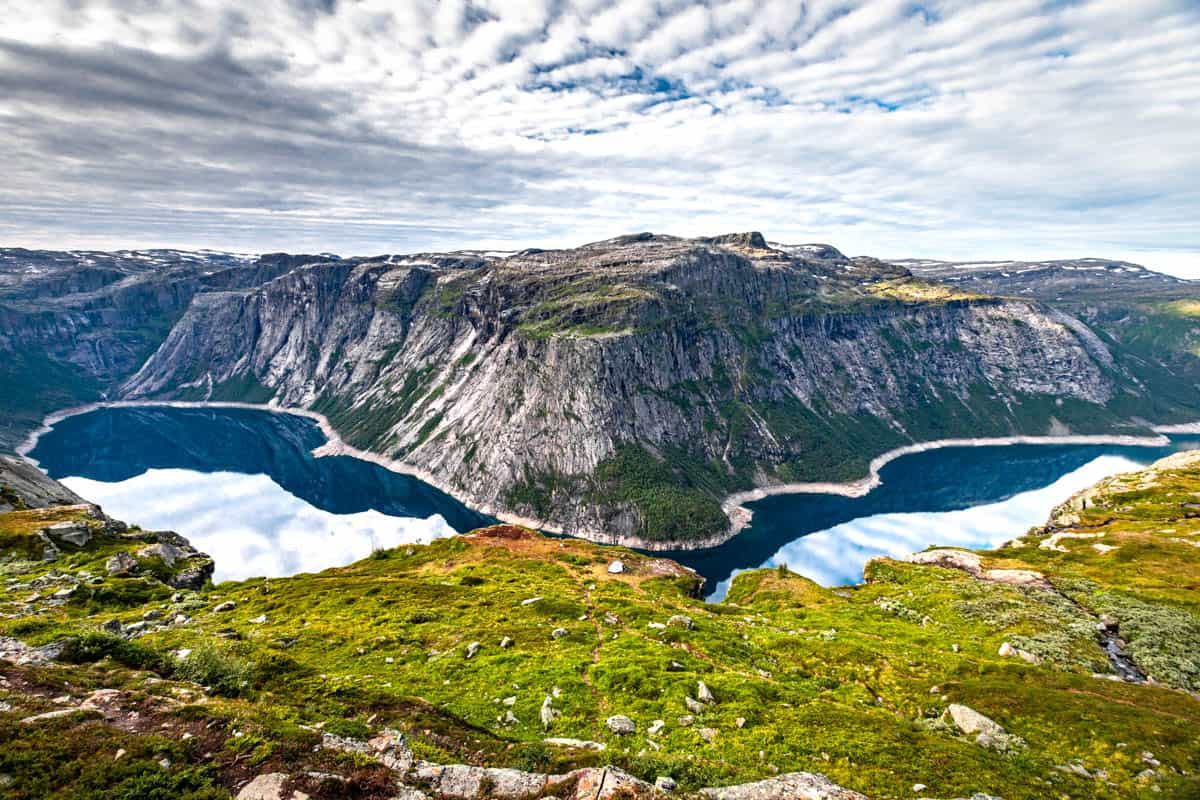
After we waited to go out on the rock twice, we headed further up the trail away from the beginning of a crowd. We found an off the beaten path spot that was a designated tent area. It worked out perfectly as a place to eat lunch, and have a short drone flight way from anyone.
As we were finishing up lunch, the sunshine finally broke out for a bit and we got a couple of great photos. I was really bummed we didn’t get any great photos actually on the troll’s tongue, but that’s the breaks sometimes!
Then we headed back down so we could make the bus schedule on the way back. As we passed the Trolltunga spot, the line up was so long we knew we didn’t have time to wait again.
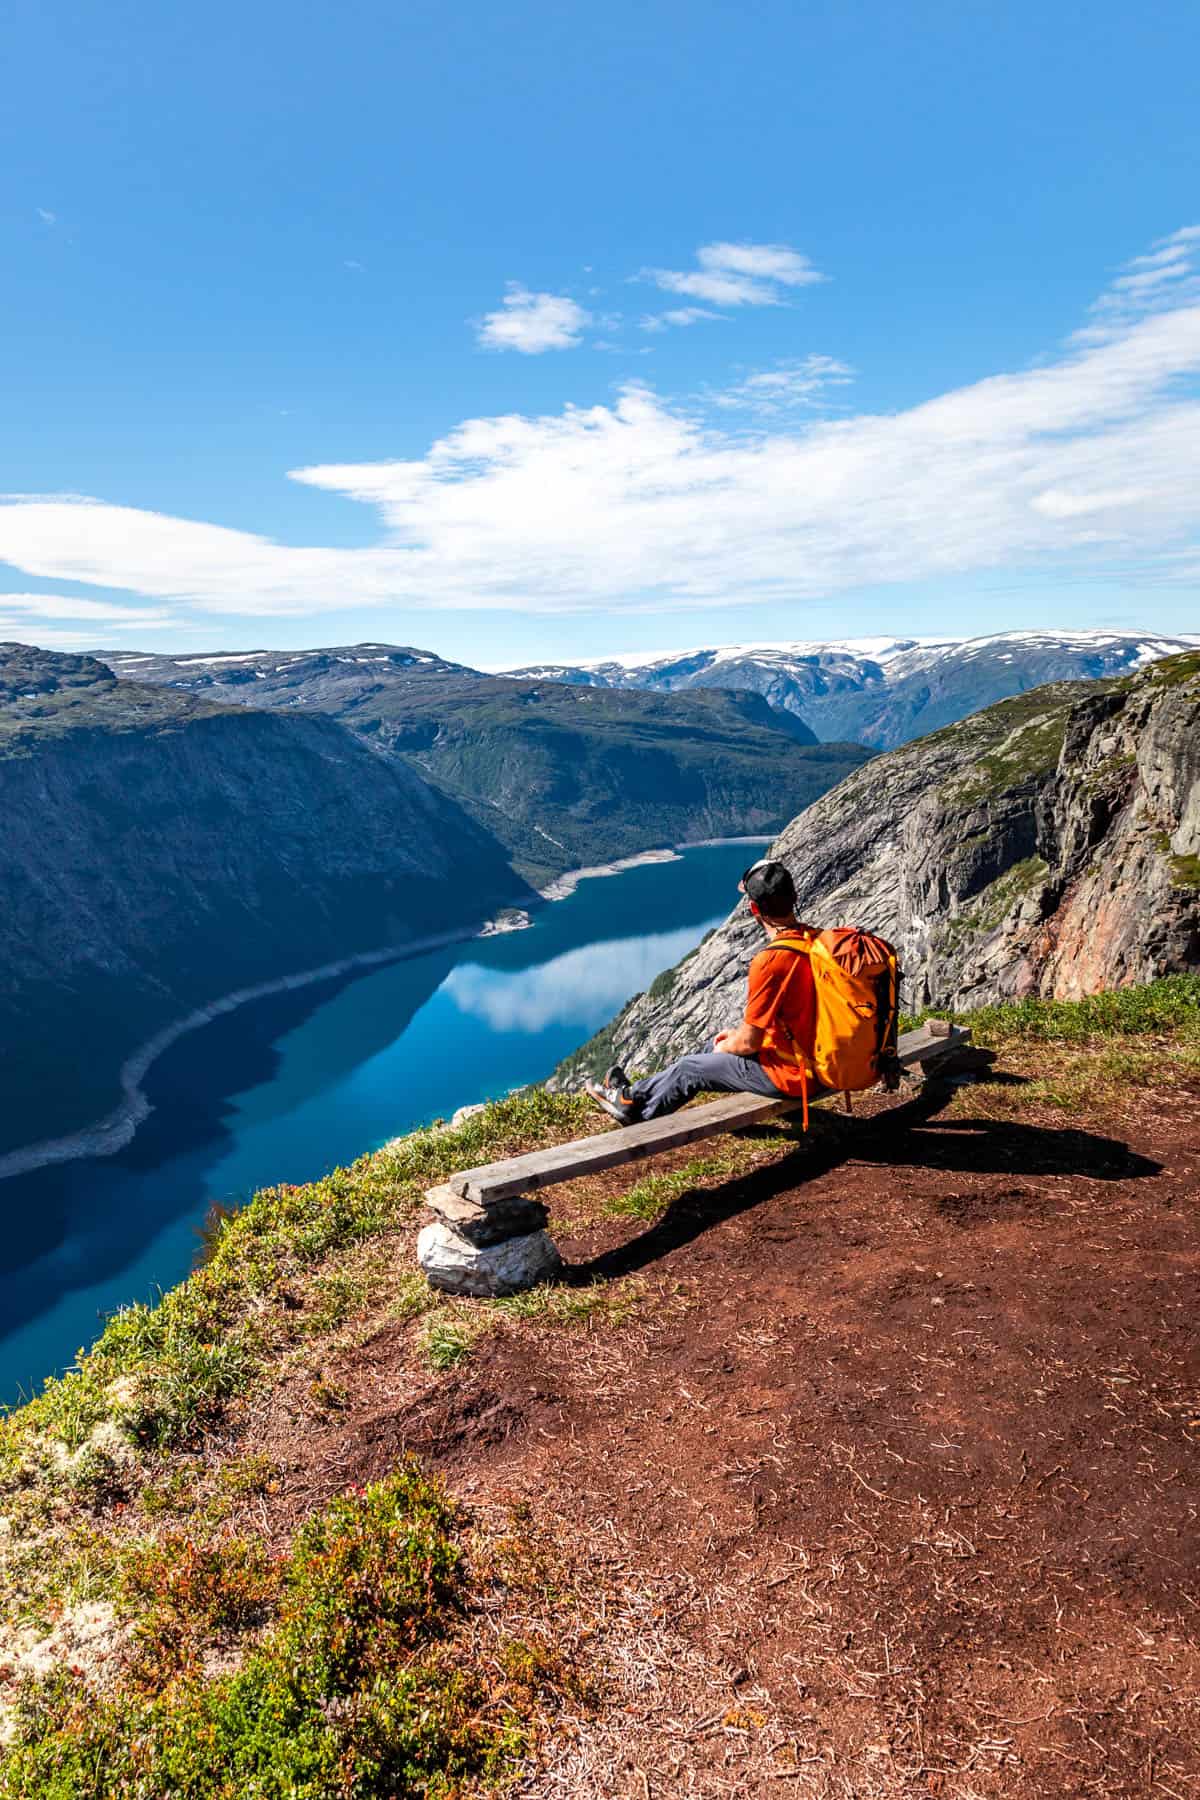
So we headed down and found a ‘secret’ bench near a campsite and hung out there for a bit in the gorgeous sunshine. It turned out to be some of our favorite times from our whole trip to Norway.
We love getting the classic ‘tourist’ spot photos, but then it’s time to find a quiet spot to enjoy the scenery!
From there we enjoyed the scenery more on the way back out to the P3 parking lot. Then we took a bus back down to P2 and need to wait about 1 hour before the next bus came.
But that turned out to be fun because we had time to refill our water bottles there and buy some ice cream at the store. The sun was shining and we enjoyed our ice cream cones while waiting for the bus.
Once we finally got back to P1 parking, we made some boxed mac and cheese in the van. Then we headed out on the road to drive a whopping 5 hours to hike Besseggen Ridge the next day.
Our original plan wasn’t so overly ambitious. But after it took 4 days to get to Norway, we kept to our original schedule minus the couple of days we lost in numerous airports. This is admittedly crazy, but looking back we don’t regret not missing a single amazing hike in Norway!
More Inspiration
- Best Things to Do in Norway – coming soon
- Best Hikes in Norway – coming soon
- Top 10 Tips for an Awesome Trip to Iceland
- Pros and Cons of Visiting the Golden Circle in Iceland
- Top 10 Tips for Visiting Glacier National Park
I hope this guide to hiking Trolltunga is helpful to your trip planning. This hike is truly incredible and not to be missed if you’re able to hike it. Norway is full of amazing hiking, but there’s no doubt this one is popular for a reason! So if you have the ability to hike Trolltunga, it’s definitely worth it, and one of our favorite adventures from the trip.