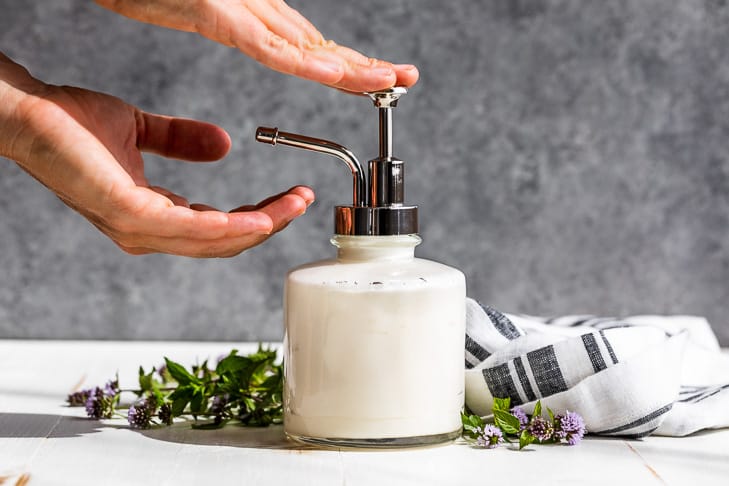
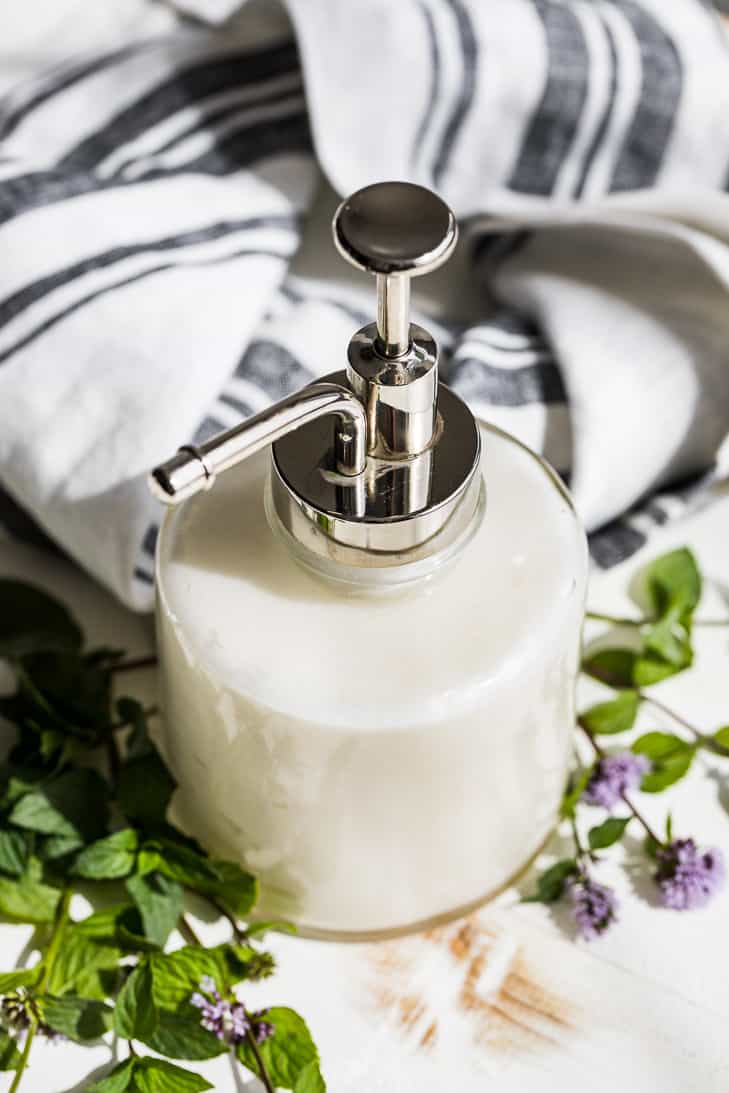
This Cooling Aloe Mint Lotion is my most popular lotion recipe for a good reason, it’s so moisturizing! It’s all thanks to a lot of aloe vera gel for hydrating combined with coconut oil for conditioning and moisturizing the skin. It’s an easy to make DIY that you can customize by changing up the essential oil to suit different seasons. This homemade lotion is easily absorbable with so much aloe vera in it, and keeps my skin nice and smooth.
This lotion is perfect for summertime, or after excercising because of the ‘cooling effect’ from the aloe and mint. It’s particularly awesome after a long day on your feet. And I really love it massaged into my legs and feet after a day hiking in the mountains. With warmer temperatures, I like to use a light moisturizer, and the cooling effect is an added bonus.
I use straight coconut oil as a moisturizer year round. But sometimes I just need a little moisturizing, not the full coconut conditioning. The 50:50 ratio of coconut oil to aloe vera in this recipe has been the perfect amount, with just enough moisturizing. It sinks right into my skin, leaving a smooth non-greasy surface.
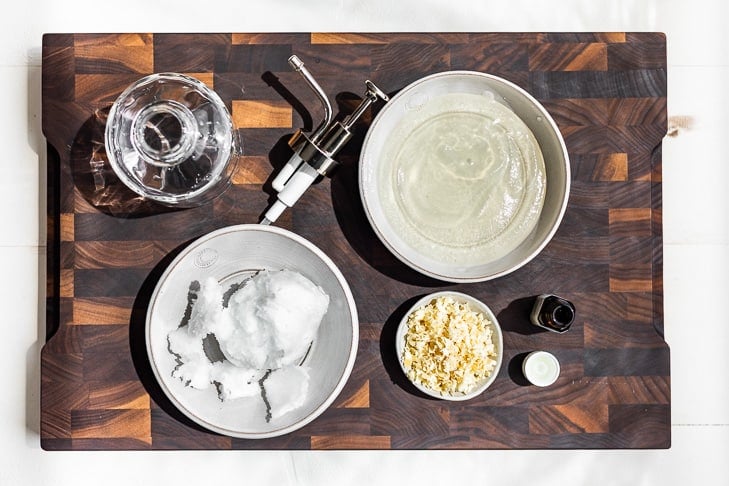
Ingredients for this Cooling Aloe Mint Lotion:
- Beeswax – I have a giant block of beeswax I’m still using up. But if you’re looking to buy beeswax I most definitely recommend getting some beeswax pellets so you don’t have to bother with grating it. However the most accurate way to use beeswax pellets is to measure by weight. So if you don’t have a scale, consider grating your beeswax instead.
- Coconut Oil – makes the perfect lightweight and easily absorbable oil to use in this lotion. And because it’s solid at room temperature it helps to thicken up the lotion as well.
- Aloe Vera Gel – I use bottled aloe vera gel, (the Desert Lily brand) because fresh aloe vera spoils too quickly to put into a lotion.
- Peppermint Essential Oil – adds to the cooling feeling of this lotion, but feel free to omit the essential oil for an unscented lotion. Or you can use any essential oil you like the smell of that works for you.
Tip: to get the beeswax off your grater, pour boiling water over the surface and watch it melt away. Or buy beeswax pellets for the easiest DIY projects!
How to make Cooling Aloe Mint Lotion:
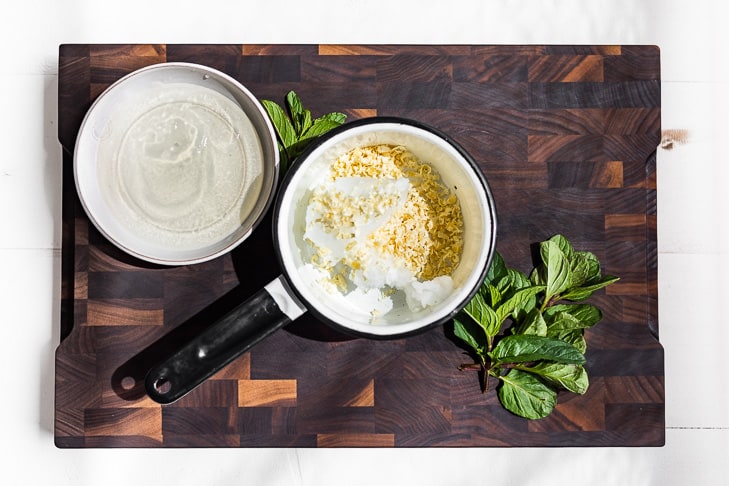
I like to have all of my ingredients ready to go before I start. That way, when the beeswax has melted into the oil, you’re ready to whisk in the aloe vera.
There are a couple key points to this lotion:
- It’s very important to make sure the beeswax has completely melted into the coconut oil, with no flecks remaining. If it’s not completely melted, the lotion won’t emulsify properly. And there will be little gritty pieces of beeswax in the finished product as well.
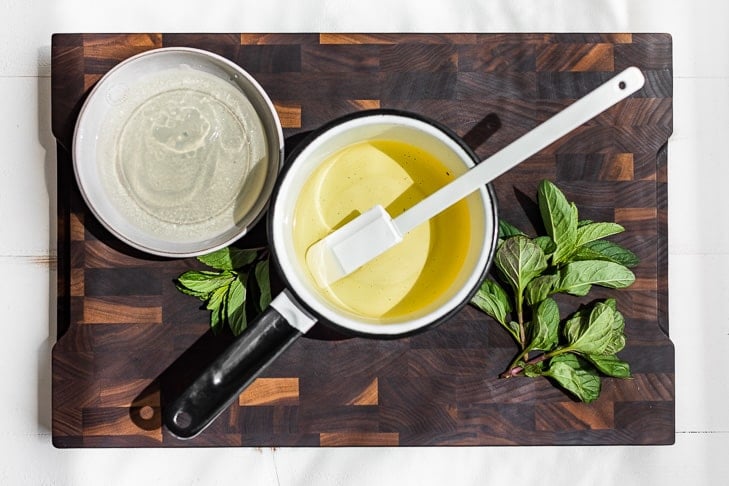
2. The aloe vera gel must be at room temperature. If you put it into the hot oil/wax mixture straight from the refrigerator, the mixture might not emulsify. Instead you might end up with clumps. Also if you add cold liquid to hot oil it can splatter. So it’s best to keep the oil mixture as cool as possible when melting the beeswax, (pictured above). Just warm it enough to melt, but don’t let it get super hot.
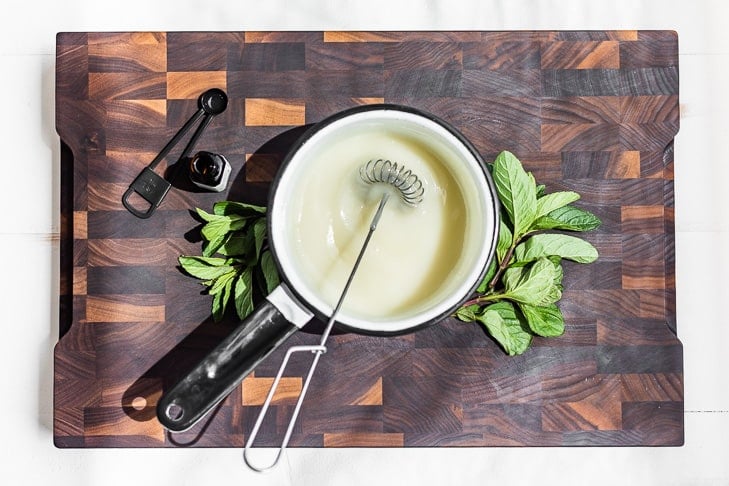
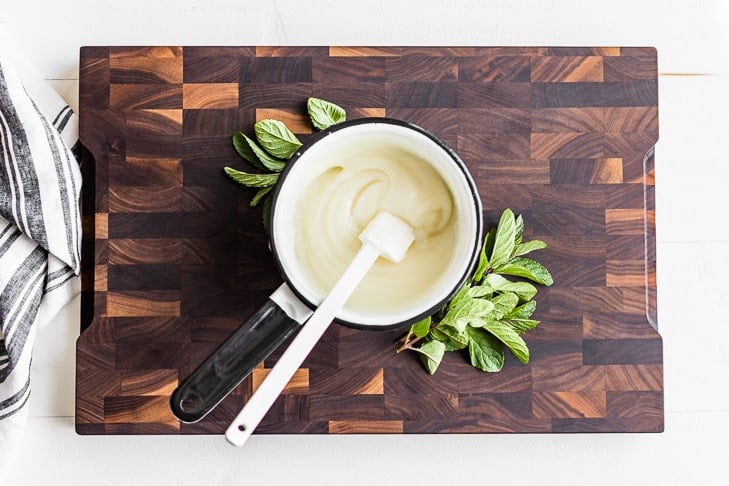
This mixture will look too thin at first, (above photo). But it thickens up as it cools (photo below). I like to blend mine on the lower settings of the blender to make it fluffier. Also, it sometimes separates as it cools if it hasn’t been properly emulsified.
If this happens running it for a few seconds on low in the blender has always made it stable for me. Once it’s fully cooled, I haven’t had it separate. You can also lightly warm the mixture and whisk thoroughly to emulsify if it didn’t come together the first time.
The cooling process can take 2-4 hours depending on your room temperature. It’s really best not to rush this process because by cooling down slowly the lotion becomes more stable. I’ve also put the lotion over an ice bath and stirred it vigorously until it thickens.
But if you keep it over the ice water too long, it will harden and separate, (so it really is best just to let it sit on the counter for a couple of hours). It’s not worth the hassle to speed up the cooling process all in all!
This is one of my most popular DIY recipes, and I hope all the extra tips I’ve added today will help you be successful in making your own lotion. Once you get the hang of it, it’s actually quite easy, and only takes a few minutes to whip up.
The reason this lotion needs a little extra care and attention is the large ratio of water to oil, which makes it less stable than normal lotions. This is also the reason it’s such a great summertime lotion though! If you’re looking for an easier first time project, try my Lavender Sugar Scrub, or my Easy Buttercream Lotion.
At home spa day inspiration:
- Refreshing Peppermint Sugar Scrub
- Moisturizing Mint Body Wash
- At Home Facial
- Finish with this lotion!
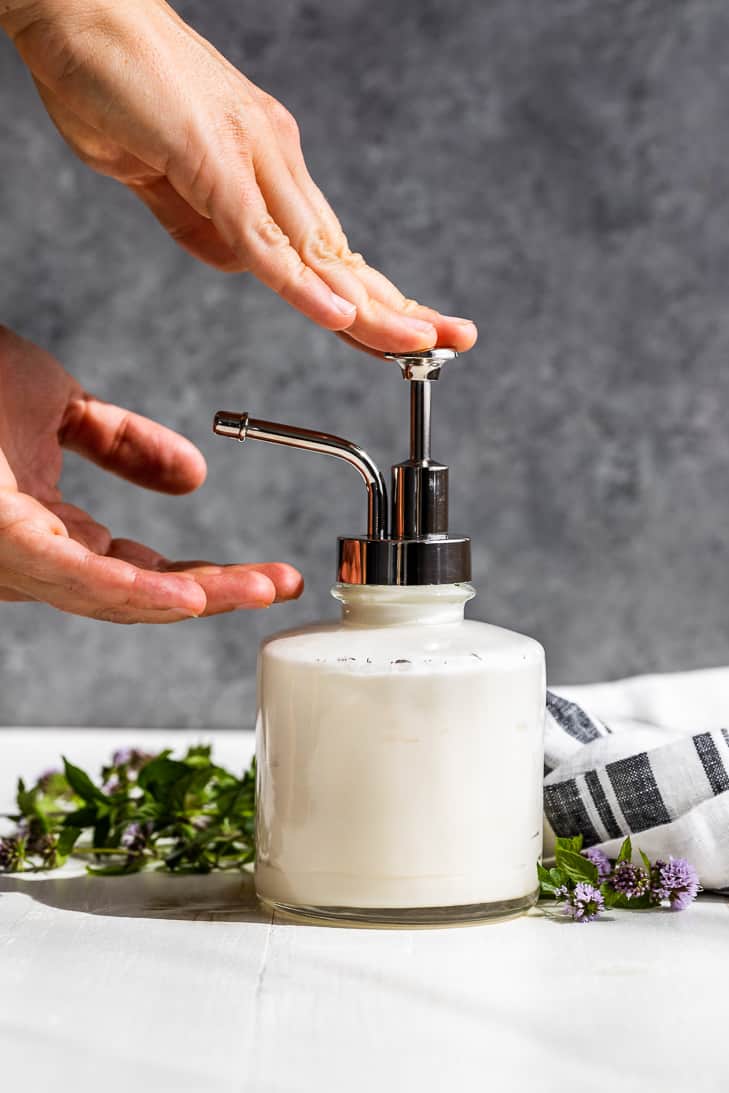
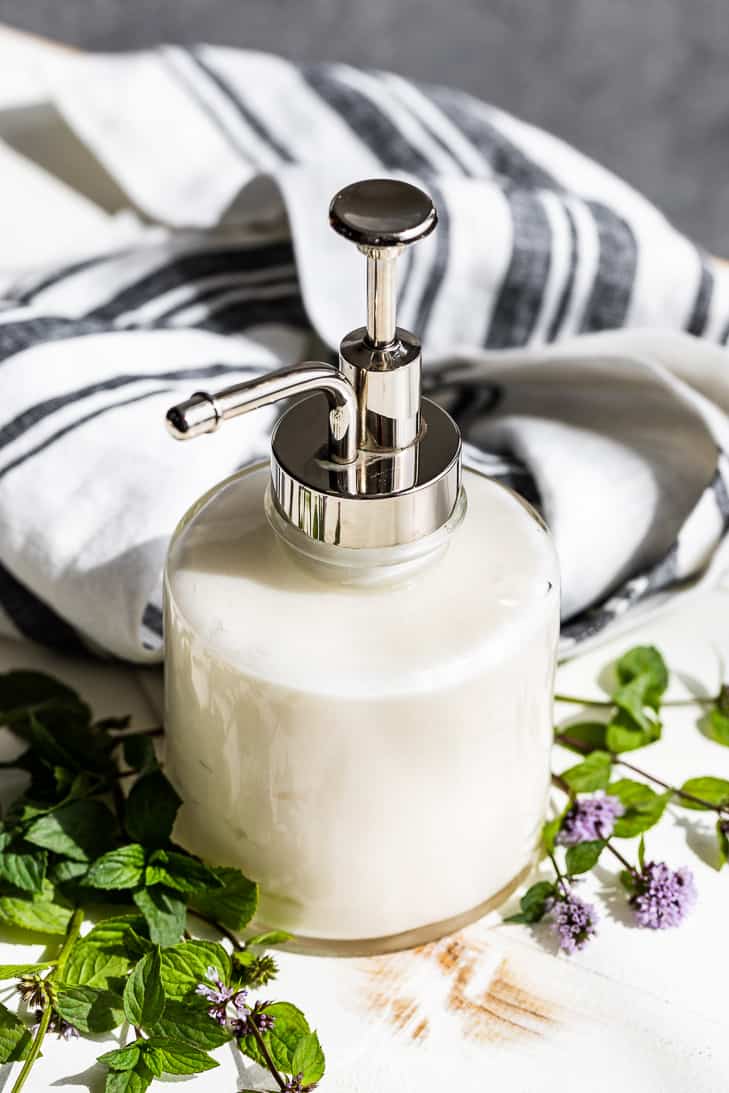
Cooling Aloe Mint Lotion
- Total Time: 15 mins
- Yield: 1 cup 1x
Description
This Cooling Aloe Mint Lotion is my most popular lotion recipe for a good reason, it’s so moisturizing! It’s all thanks to a lot of aloe vera gel for hydrating combined with coconut oil for conditioning and moisturizing the skin. It’s and easy to make DIY that you can customize by changing up the essential oil to suit different seasons. This homemade lotion is easily absorbable with so much aloe vera in it and keeps my skin nice and smooth.
Ingredients
1/4 cup grated beeswax, 11 grams
1/2 cup coconut oil, 122 grams
1/2 cup aloe vera gel, 122 grams, room temperature
1/8 Teaspoon peppermint essential oil
Instructions
Place the beeswax and coconut oil in a saucepan over low heat. Heat just until just melted with no remaining flecks of beeswax.
Try to keep the temperature as low as possible to preserve the benefits the of coconut oil.
Remove the oil mixture from the heat, and hand whisk in the room temperature aloe vera gel and peppermint essential oil until it’s thoroughly combined.
Let the lotion cool to room temperature, about 2-4 hours. Whisk again, or place in the blender and blend at a medium speed for about 30 seconds for a fluffier version.
Notes
This lotion will naturally become thicker and more solid over time, as some of the aloe vera slowly evaporates.
- Prep Time: 10 mins
- Cook Time: 5 mins
- Category: DIY
- Method: Whisking
This recipe has been updated with new photos, step by step process, and more tips and additional information in 2021.
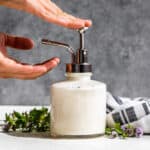
Is this thin enough to use in a pump or squirt bottle?
If it’s more of a cream, could I use Aloe Vera juice instead of gel?
The consistency starts off being fairly lotion like, but over a week or two it solidifies into more of a cream. I’m not sure if it will work in a pump bottle or not, and I’m thinking the aloe vera juice might work but again I’m not sure since I haven’t tried it myself. You could try my Easy Buttercream Lotion instead (adding essential oils if you’d like). I know for sure that that one works well in a pump because that’s how I always use it. I’m including the link below, and be sure to let me know if you have anymore questions!
https://getinspiredeveryday.com/lifestyle/easy-buttercream-lotion/
Hi there, yesterday I boiled a balm mixture together to try to see if Aloe would blend well and it didn’t blend at all. I reheated it 3 times and mixed every time but once it starts hardening it just separates completely, the aloe forms one giant bubble under the layer of wax (plus a bunch of other bubbles) and if I continuously mix it just gets hard and the aloe splashes around like it’s water.
Does it sound like I’m not emulsifying it correctly? I thought Aloe wouldn’t blend because of it’s water contents and I was about ready to give up before I read this article. I don’t have a working blender at the moment but it sounds like it could come in handy later on, minus the part where I have to clean wax out of the blender.
😀
Getting the emulsifying correct can be tricky at first but once you get the hang of it, I promise it’s a lot easier! One tip I just discovered is you can warm the mixture just until it melts, and then place the mixture over an ice bath and whisk it constantly for 2-3 minutes until the mixture cools and emulsifies. This really helps avoid any problems with temperature and the wax hardening on you because it takes the temperature down to room temperature while you’re still whisking which also helps to stabilize the lotion. I hope this helps, and be sure to let me know if I can help with anymore questions! 🙂
Thanks to share helpful information about coconut oil.
It’s one of my favorite all around ingredients!
Do you think that Vitamin E (oil from, say, gel capsules) could be added in? Vitamin E is the best thing I know of for burns–sunburns included.
Yes I think subbing in some Vitamin E oil for part of the coconut oil should work! Let me know how it goes and if you have anymore questions. 🙂
Just so you know if you are unable to find beeswax you can use soy wax and it is sold at Michael’s. Great recipe by the way…..Love it
Good to know, and thanks for the tip! So glad you liked the lotion, it’s a real favorite in the summertime.
Hi Kari,
I am needing a massage lotion that can be pumped out of a bottle for my massage work. My previous supplier was using Shea butter, bees wax, grape seed oil, and a little green tea or water as well as some essential oils. I don’t know the proportions or how to remake it, and I cannot seem to find any recipes for making such a lotion. Can you give me any suggestions? Thanks so much!
I wish I could help you out, but I really wouldn’t know what proportions to use either! I think this Cooling Aloe-Mint Lotion might be too thick for what you’re looking for as it continues to solidify the longer it sits. Best of luck, and I’ll let you know if I come across anything! 🙂
I was inspired by your question about a shea butter lotion, so I did a little experimenting and came up with a new creation! I’m not sure it’s what you’re looking for, but it goes on smoothly and leaves your skin incredibly soft. I bought a soap dispenser from Target for the lotion and it’s working great so far! I’m including the recipe in an email because it might take me a couple of weeks to get it to the blog. I hope maybe this works for you!
Would it be possible to use eucalyptus oil? That might add to the tingly sensation.
I’ve never used eucalyptus oil so I really couldn’t say, but be sure to let me know if you try it out!
Do the beeswax beads from the same company work the same?
Beeswax beads should work the same way, but the measurement might not be the same because of a difference in volume.
Hi Kari! I am trying to achieve a roll on foot balm that leaves the feet really cooled off! I have tried using beeswax, shea butter, peppermint oil menthol oil and even Vicks to try to achieve a cooling effect..but sadly I have not reached my goal yet.:( I would like to use in as a roll on type salve. If you have any suggestions please give me any advice to reach my goal!!!
Thank you! Bonnie Bailey
It sounds like you want a consistency similar to chapstick if you’re going to roll it on, so I would start by looking at the amount of beeswax in a chapstick recipes and go from there for the texture part. I don’t have any ideas other than what you’ve already tried for the cooling off effect you described, I would think that any essential oil from the mint family should do the trick – maybe add a bit more to your recipe?
I made this for my self using peppermint essential and it turned out so fluffy and creamy. I loved it!
So glad you like it! It’s still my all-time favorite lotion that’s on the lighter side, I’m working on a few super moisturizing ones but this one takes the cake for everyday use!