
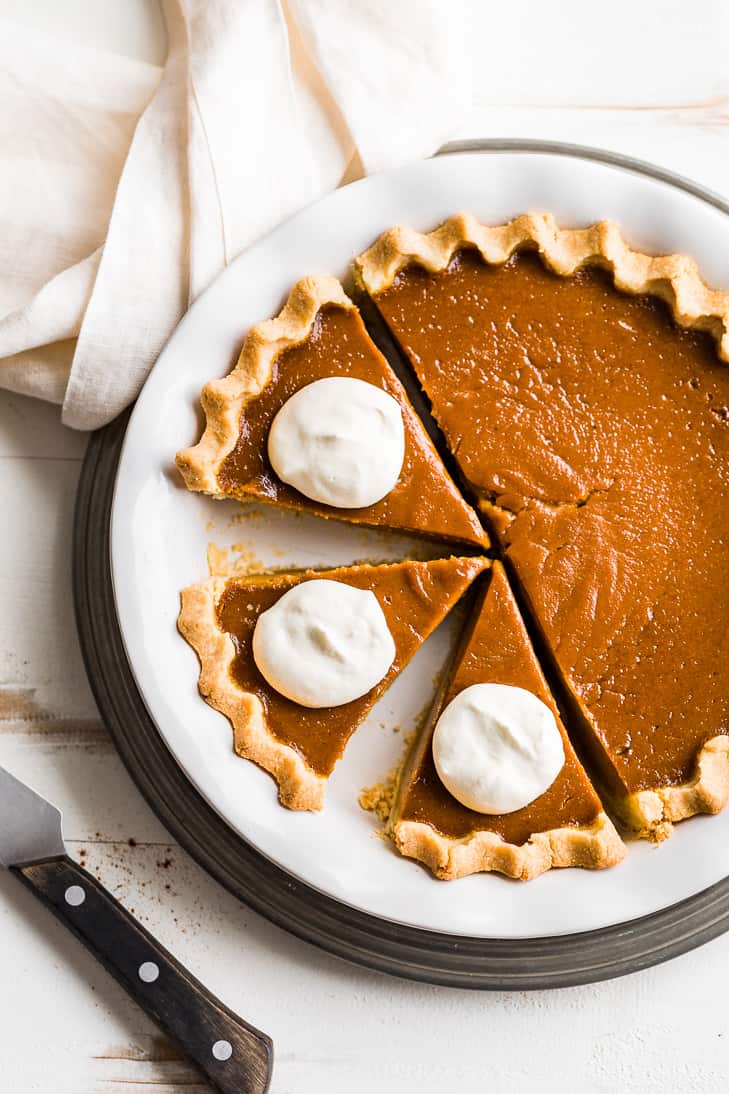
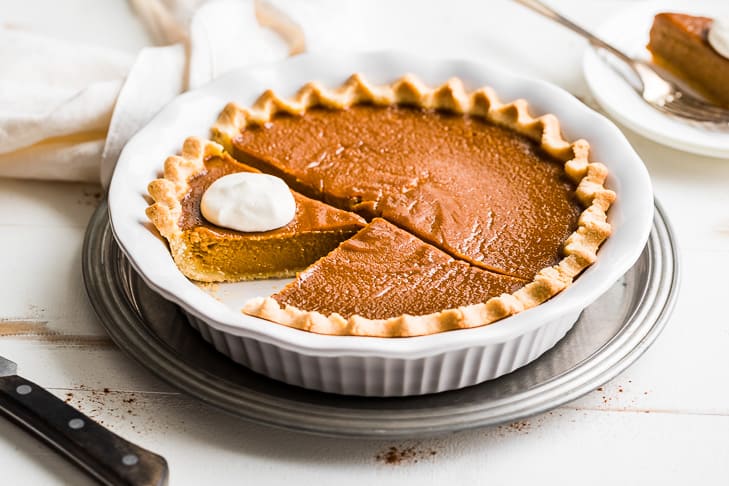
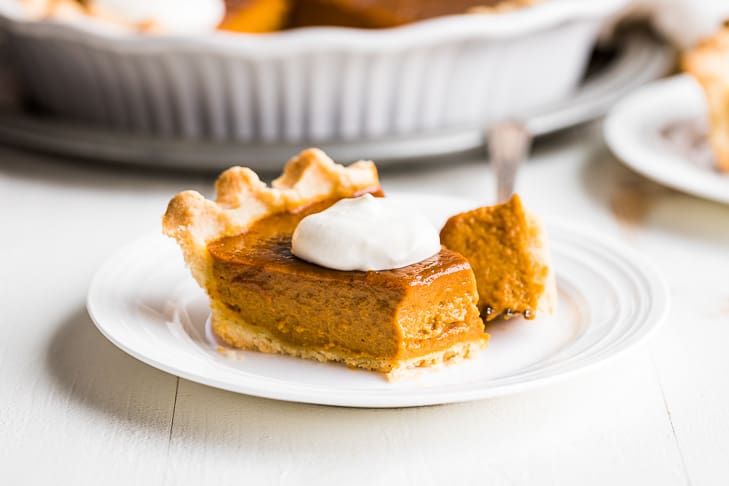
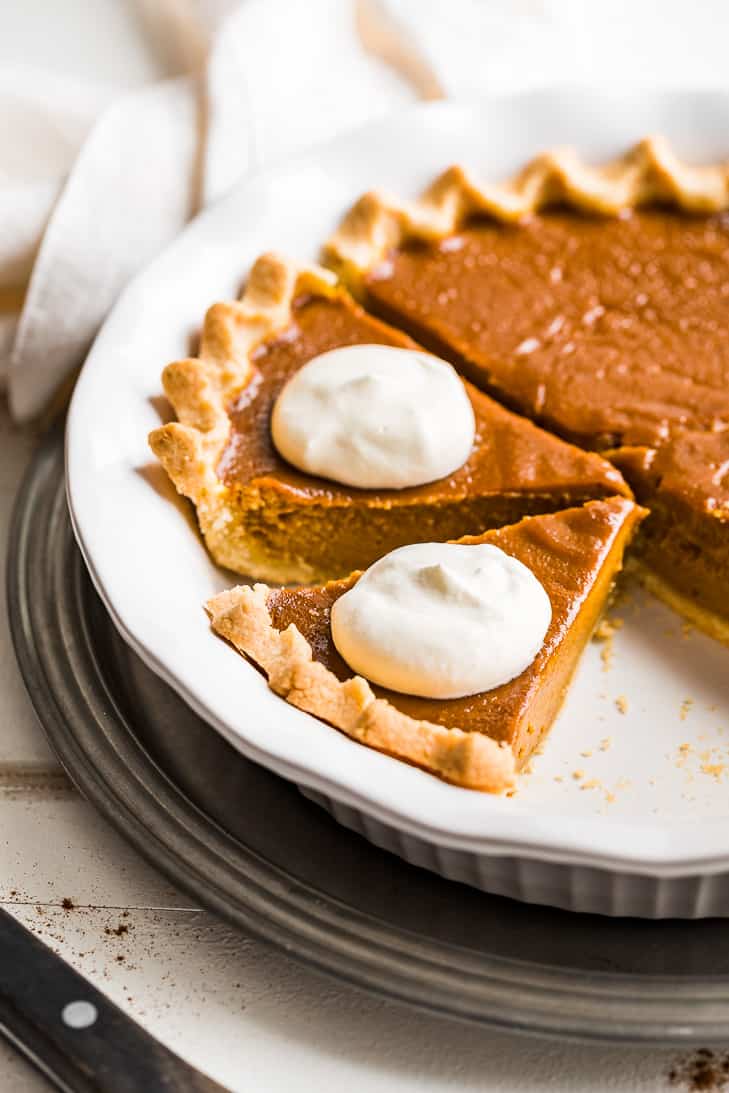
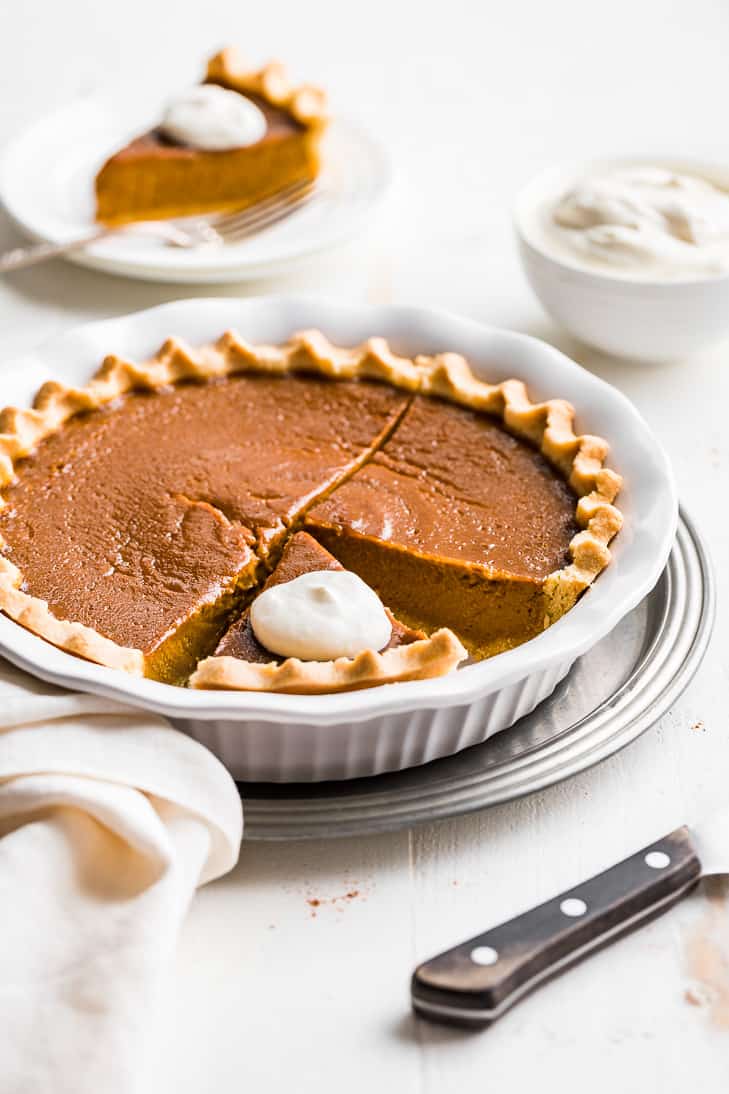
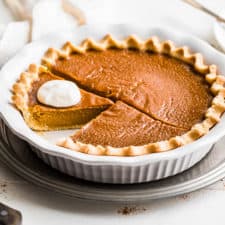
Silky smooth and perfect spiced filling in a flakey crust, this Paleo Pumpkin Pie recipe is our Thanksgiving go-to. It’s also gluten-free and dairy free as well. It’s naturally sweetened with maple syrup, and there’s no refined sugar in this recipe. Serve this holiday favorite with my Coconut Whipped Cream or Ultimate Whipped Cream.
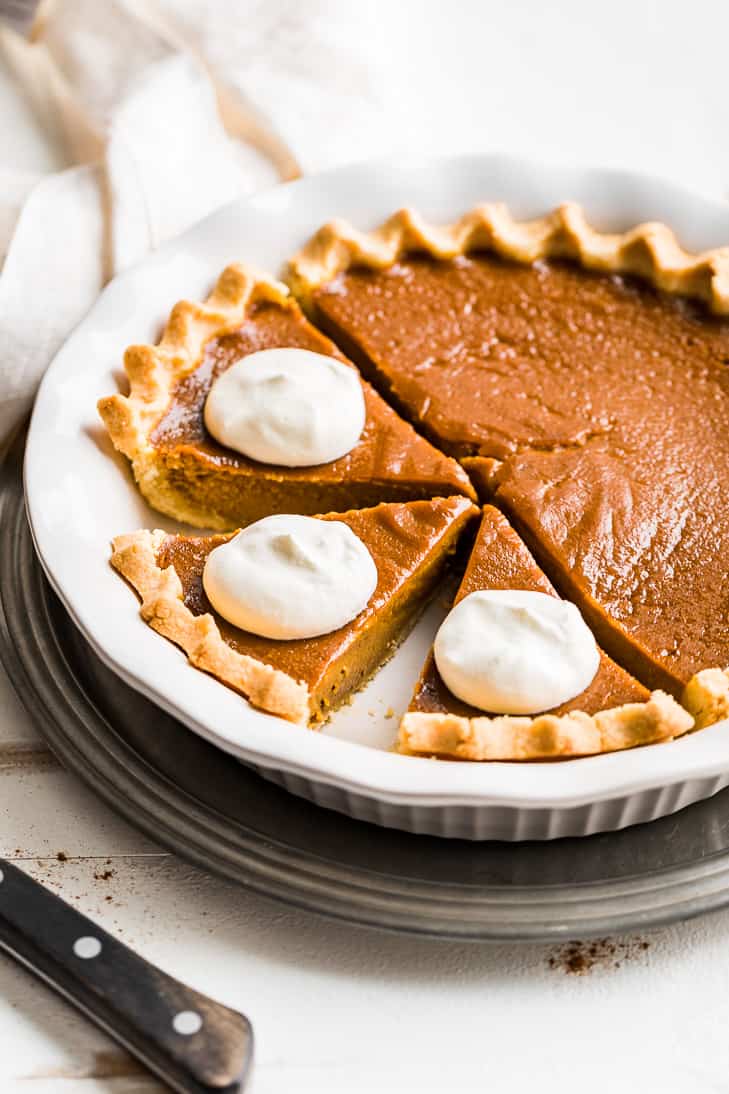
It’s finally here! The much-requested recipe for Paleo Pumpkin Pie. I’ve tested and retested to get the perfect flaky paleo pie crust along with a silky smooth pumpkin filling. And you’ll find all my tips and tricks below that really make this the best pumpkin pie.
I feel like I’m the last person who should be coming up with a recipe for pumpkin pie. In fact, I stopped making pumpkin pie during the holidays years ago because it never got eaten.
About a week after every Thanksgiving, I ended up throwing away most of the pie. And so I just concentrated on making what everyone in our family actually liked.
So if you’re also not a huge fan of pumpkin pie, stick around because this one might change your mind! In fact over the last week, I’ve eaten more pumpkin pie than I have in the rest of my lifetime combined, (no exaggeration!).
My sheer number of pieces of pumpkin pie lately was all eaten in the name of ‘recipe testing’ you know. And Tyler, (who isn’t fond of pumpkin pie either) was all too happy to ‘help me out’!
While he was polishing up the last piece he said, ‘you know… this is so good! I didn’t really expect to want to keep eating more and more pumpkin pie’.
So all in all, I think we’ve hit on a keeper of a holiday recipe you’re going to want to make again and again. And because we can’t get enough pumpkin now, we also have this Pumpkin Crisp recipe I think you’ll love. It has a smooth pumpkin pie filling topped with a traditional crisp topping!
Let’s make this recipe step by step
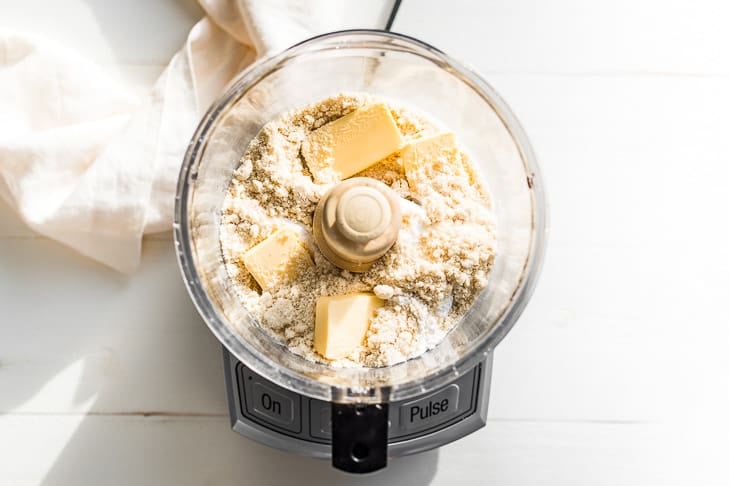
Step 1: First we’re going to make the crust. It comes together super easy in the food processor. You can use butter/ghee/coconut oil/or palm shortening here.
And unlike a regular all-purpose flour crust, you don’t have to worry about overworking it.
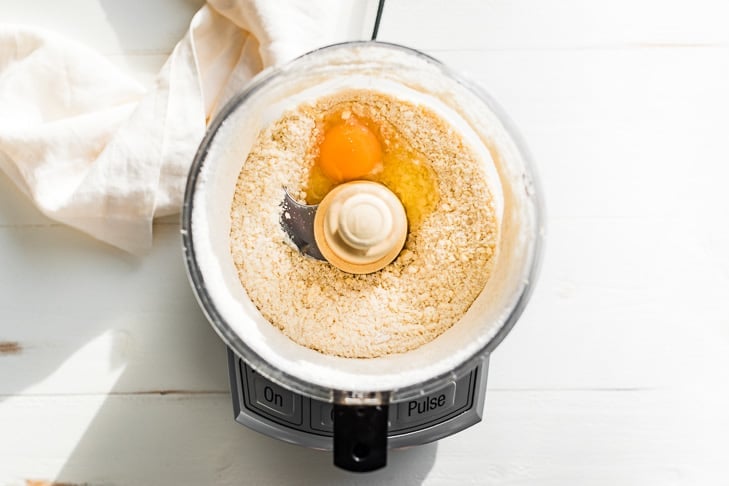
Step 2: After you process the butter into the flour mixture, we’re going to add an egg. Eggs are essential to the texture of both the crust and the filling of this recipe.
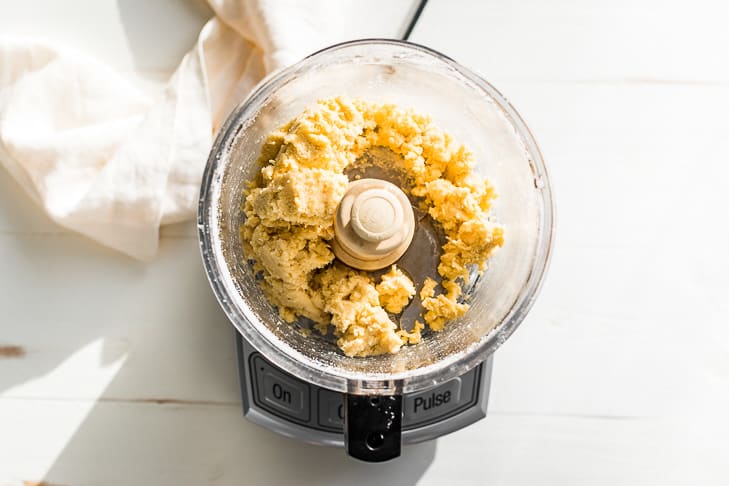
Step 3: After processing a touch more, you’ll have a beautifully smooth pie crust dough.
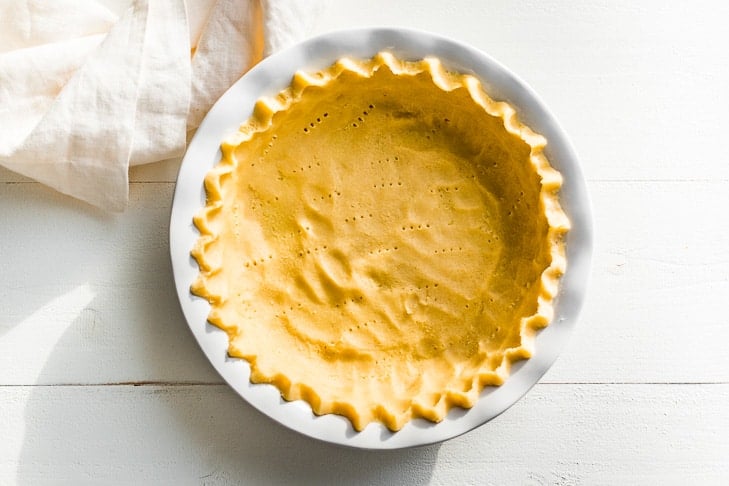
Step 4: From there, you want to press it out by hand into a regular 9″ pie plate.
You can try to roll paleo pie crusts traditionally, but I find it’s more work than it’s worth. They tend to crumble when you transfer them from the wax paper to the pie plate. So it’s easiest to just press it out by hand!
Ingredients for the pumpkin pie filling
- Canned pumpkin – You want to look for canned pumpkin, not pumpkin pie filling. The difference between the 2 is pumpkin pie filling comes with spices and sweeteners added. Canned pumpkin has just 1 ingredient – pumpkin puree. (Also I don’t recommend using your own pumpkin purée made from scratch because you won’t know if there’s the right amount of moisture. And there’s no guarantee of success with all of the variables of homemade purée.)
- Pumpkin Pie Spice – this is a blend of multiple different spices and I like using it here because it simplifies measuring out all the different spices.
- Maple syrup – This ended up being my preferred sweetener that perfectly compliments the spices for the filling. Pure maple syrup, (I used Grade A amber) makes the best texture and color compared to coconut sugar.
- Coconut milk – I used coconut milk in place of the heavy cream or in some recipes sweetened condensed milk that’s normally called for. There’s no discernible coconut flavor in the final product though!
- Eggs – pumpkin pie filling is a custard, and eggs provide the perfect texture for this pie.
- Tapioca starch – this helps to stabilize the eggs and thicken the filling to a perfectly sliceable texture. You can also use cornstarch or arrowroot powder in place of the tapioca.
Tips & Tricks for the perfect pie filling
- The first step for the filling is to blend the pumpkin purée with the spices and maple syrup in the blender. This gives you a smooth end result after the pie is baked.
- Then the filling is simmered on the stove before you add the eggs to concentrate the flavor.
- And finally, the hot filling is poured into a hot crust, to bake for the best texture.
Benefits of cooking the filling on the stovetop
- By cooking the pumpkin together with the spices you eliminate extra moisture and concentrate the flavor.
- And secondly, when you add a hot filling to a hot crust you get the perfect texture in the filling. It also helps to eliminate large cracks across the top of your pie. Paleo pie crusts do have a tendency to burn with long baking times. But you avoid all of this because the filling cooks faster in the oven when it goes in hot.
Most important of all, by adding a hot filling to the hot crust you get an evenness during the baking process. So say goodbye to overcooked/curdled edges, and enjoy your perfectly smooth pumpkin pie!
Ways to serve this
- Homemade Coconut Whipped Cream (for dairy-free) or my Ultimate Whipped Cream
- If you like ice cream better, try my Coconut Ice Cream or Vanilla Ice Cream recipes.
- Serve this healthy pumpkin pie as part of my Paleo Thanksgiving Menu.
Storing leftovers
- To store – store any leftover pumpkin pie in an airtight container in the refrigerator for 3-4 days.
- Make ahead – I recommend making this pie the same day you’re going to serve it, but you can make it in the morning because it needs a few hours to set up.
- To freeze – freeze any leftover slices of pie in an airtight container for up to 1 month. Defrost in the fridge overnight. Note that the pie crust will not be nearly as crispy.
Tips to keep your pumpkin pie from cracking
- The most common reason for large cracking in pumpkin pie is over-baking. You want to pull the pumpkin pie out when it’s jiggly like jello in the middle. The filling will continue to set up from there as the pie cools.
- Another reason the filling cracks is because for most recipes the cold filling goes into the crust. This is problematic for 2 reasons, first, it takes longer to bake, and so the edges cook way sooner than the middle which causes cracking. (Secondly, the longer cooking time can sometimes result in a soggy pie crust as well as a cracked filling.)
- And the final reason could be the proportion of ingredients for your filling. I’ve tested this pumpkin pie extensively and it doesn’t crack if you pull it from the oven correctly. I did over-bake it once and had cracks across the filling.
- Cool the pie at room temperature completely. If you move the pie to the refrigerator too soon while it’s still hot, that can also cause cracking.
Lastly, there’s nothing to worry about if your filling does crack because it still tastes amazing!
FAQ’s
Yes, you can make pumpkin pie without a crust! Follow the instructions in my recipe for how to make the filling and bake until it’s just set but still wiggly like jello. Another option if you don’t want a crust is to make my Pumpkin Crisp which is pumpkin pie with a crisp topping and no crust.
A pumpkin pie is paleo when it’s made with a paleo crust that is grain-free and the filling is made without dairy or refined sugar. My recipe has an almond flour crust and the filling is made with coconut milk and maple syrup.
More Pumpkin Recipe Inspiration
I really hope you enjoy this Paleo Pumpkin Pie recipe! If you do get a chance to make this recipe, I’d love to hear from you in the comments.
The Best Paleo Pumpkin Pie
INGREDIENTS
Paleo Pie Crust:
- 3/4 cup fine almond flour
- 3/4 cup tapioca starch
- pinch of sea salt
- 6 tbsp butter - ghee, or coconut oil/palm shortening for paleo
- 1 egg
Pumpkin Pie Filling:
- 15 ounce can pumpkin purée
- 1 tbsp pumpkin pie spice
- 2/3 cup maple syrup - I used Grade A amber
- 1/2 tsp sea salt
- 1/2 cup full-fat coconut milk - from the can
- 3 eggs
- 1 tbsp tapioca starch
- 1 tsp vanilla extract
INSTRUCTIONS
- Preheat the oven to 350ºF.
- Place the almond flour, tapioca starch, pinch of salt, and butter/coconut oil/palm shortening into a food processor. Pulse until fine crumbs appear, then add the egg. Pulse again until a smooth dough forms.
- Transfer the dough to a regular 9" pie plate. Pat the crust out by hand making it as even as possible. Flute the edges using your fingers to create points, or decorate the edges as desired.
- Using a fork, poke a few holes around the bottom and sides of the pie crust. Place the crust into the oven on the bottom rack and par-bake until lightly golden, 15 minutes. Check the pie crust about halfway through the baking time. If it's bubbling up, poke it with the fork or the tip of a paring knife again, and continue to bake.
- While the crust is cooking make the filling. Start by adding the pumpkin purée, pumpkin pie spice, and maple syrup to the blender. Blend on medium speeds, (5-6 on a Vitamix) until smooth.
- Pour the filling into a medium-sized pan, and bring the mixture to a boil stirring constantly. Simmer the pumpkin mixture for 5 minutes, stirring often. Meanwhile in the same blender container, (no need to clean it in between) blend the eggs and tapioca starch together.
- When the pumpkin mixture has cooked for 5 minutes, remove it from the heat and whisk in the coconut milk. Add about 1/2 cup of the filling to the egg mixture and blend immediately on low speeds to combine.
- This tempers the eggs so they don't scramble when you add them to the pumpkin mixture. Then whisking constantly pour the tempered egg mixture into the pumpkin mixture. Whisk in the vanilla extract.
- Remove the hot crust from the oven, and pour the hot pumpkin pie filling slowly into the crust. Place the pie back in the oven on the center rack. Cook until the pumpkin pie filling is almost set, but still wiggly like jello in the center, about 25-30 minutes.
- When the pumpkin filling is done, remove the pie from the oven and cool completely on a cooling rack. This pie is sliceable in about 4-5 hours. You can also refrigerate it to firm it up even more.
- Serve with whipped cream and enjoy!
So yummy!! Everything was perfect! Next time I might make the crust a little thinner but over all was a total winner!
Thanks so much, I’m so glad you enjoyed it so much!
Hi! Are tapioca flour and starch the same thing? I am having a terrible time finding tapioca starch.
Yes tapioca flour and starch are the same thing. You can also substitute arrowroot or cornstarch for the tapioca starch if that helps!
Good afternoon,
I made the pie yesterday! It turned out well but the crust was very hard to handle and was very wet. Not sure what I did wrong. Unfortunately the holes did not hold up when I parbaked it so the center bubbled up a bit. Can’t wait to try it out tomorrow though.
I don’t think you did anything wrong when it comes to the crust, paleo crusts are hard to handle so I recommend using wax or parchment paper to help you ‘pat’ it out if you find it too sticky. The ‘wetness’ of the crust will vary some because every single egg is slightly different. I sure hope you enjoyed it! I’m also going to make a note about the par baking process to check and if it’s bubbling up, just poke it with a knife or fork again!